Step-by-step techniques
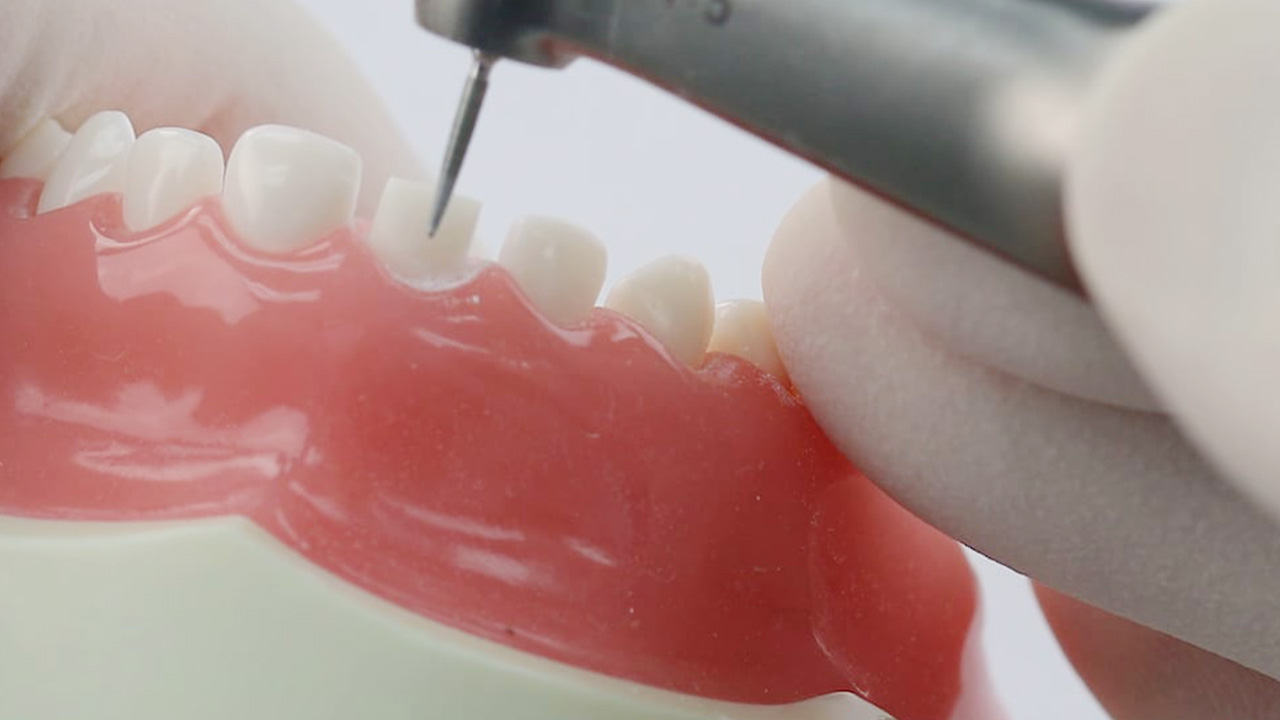
Learn our Accelerated Subgingival Atraumatic Preparation (A.S.A.P.) technique
Step-by-step technique
Incisor prep
Incisal reduction
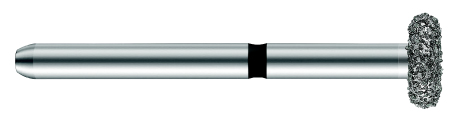
The EZPrep 001 Bur works perfectly for using as a depth-cut guide during incisal reduction. Reductions should be 1.5mm or enough to allow subgingival seating.
Pro tip
To compensate for eruption of the clinical crown during development in patients less than three years old, additional incisal reduction up to 2mm may be needed.
Would you rather watch?
Anterior
Single unit preparation: E
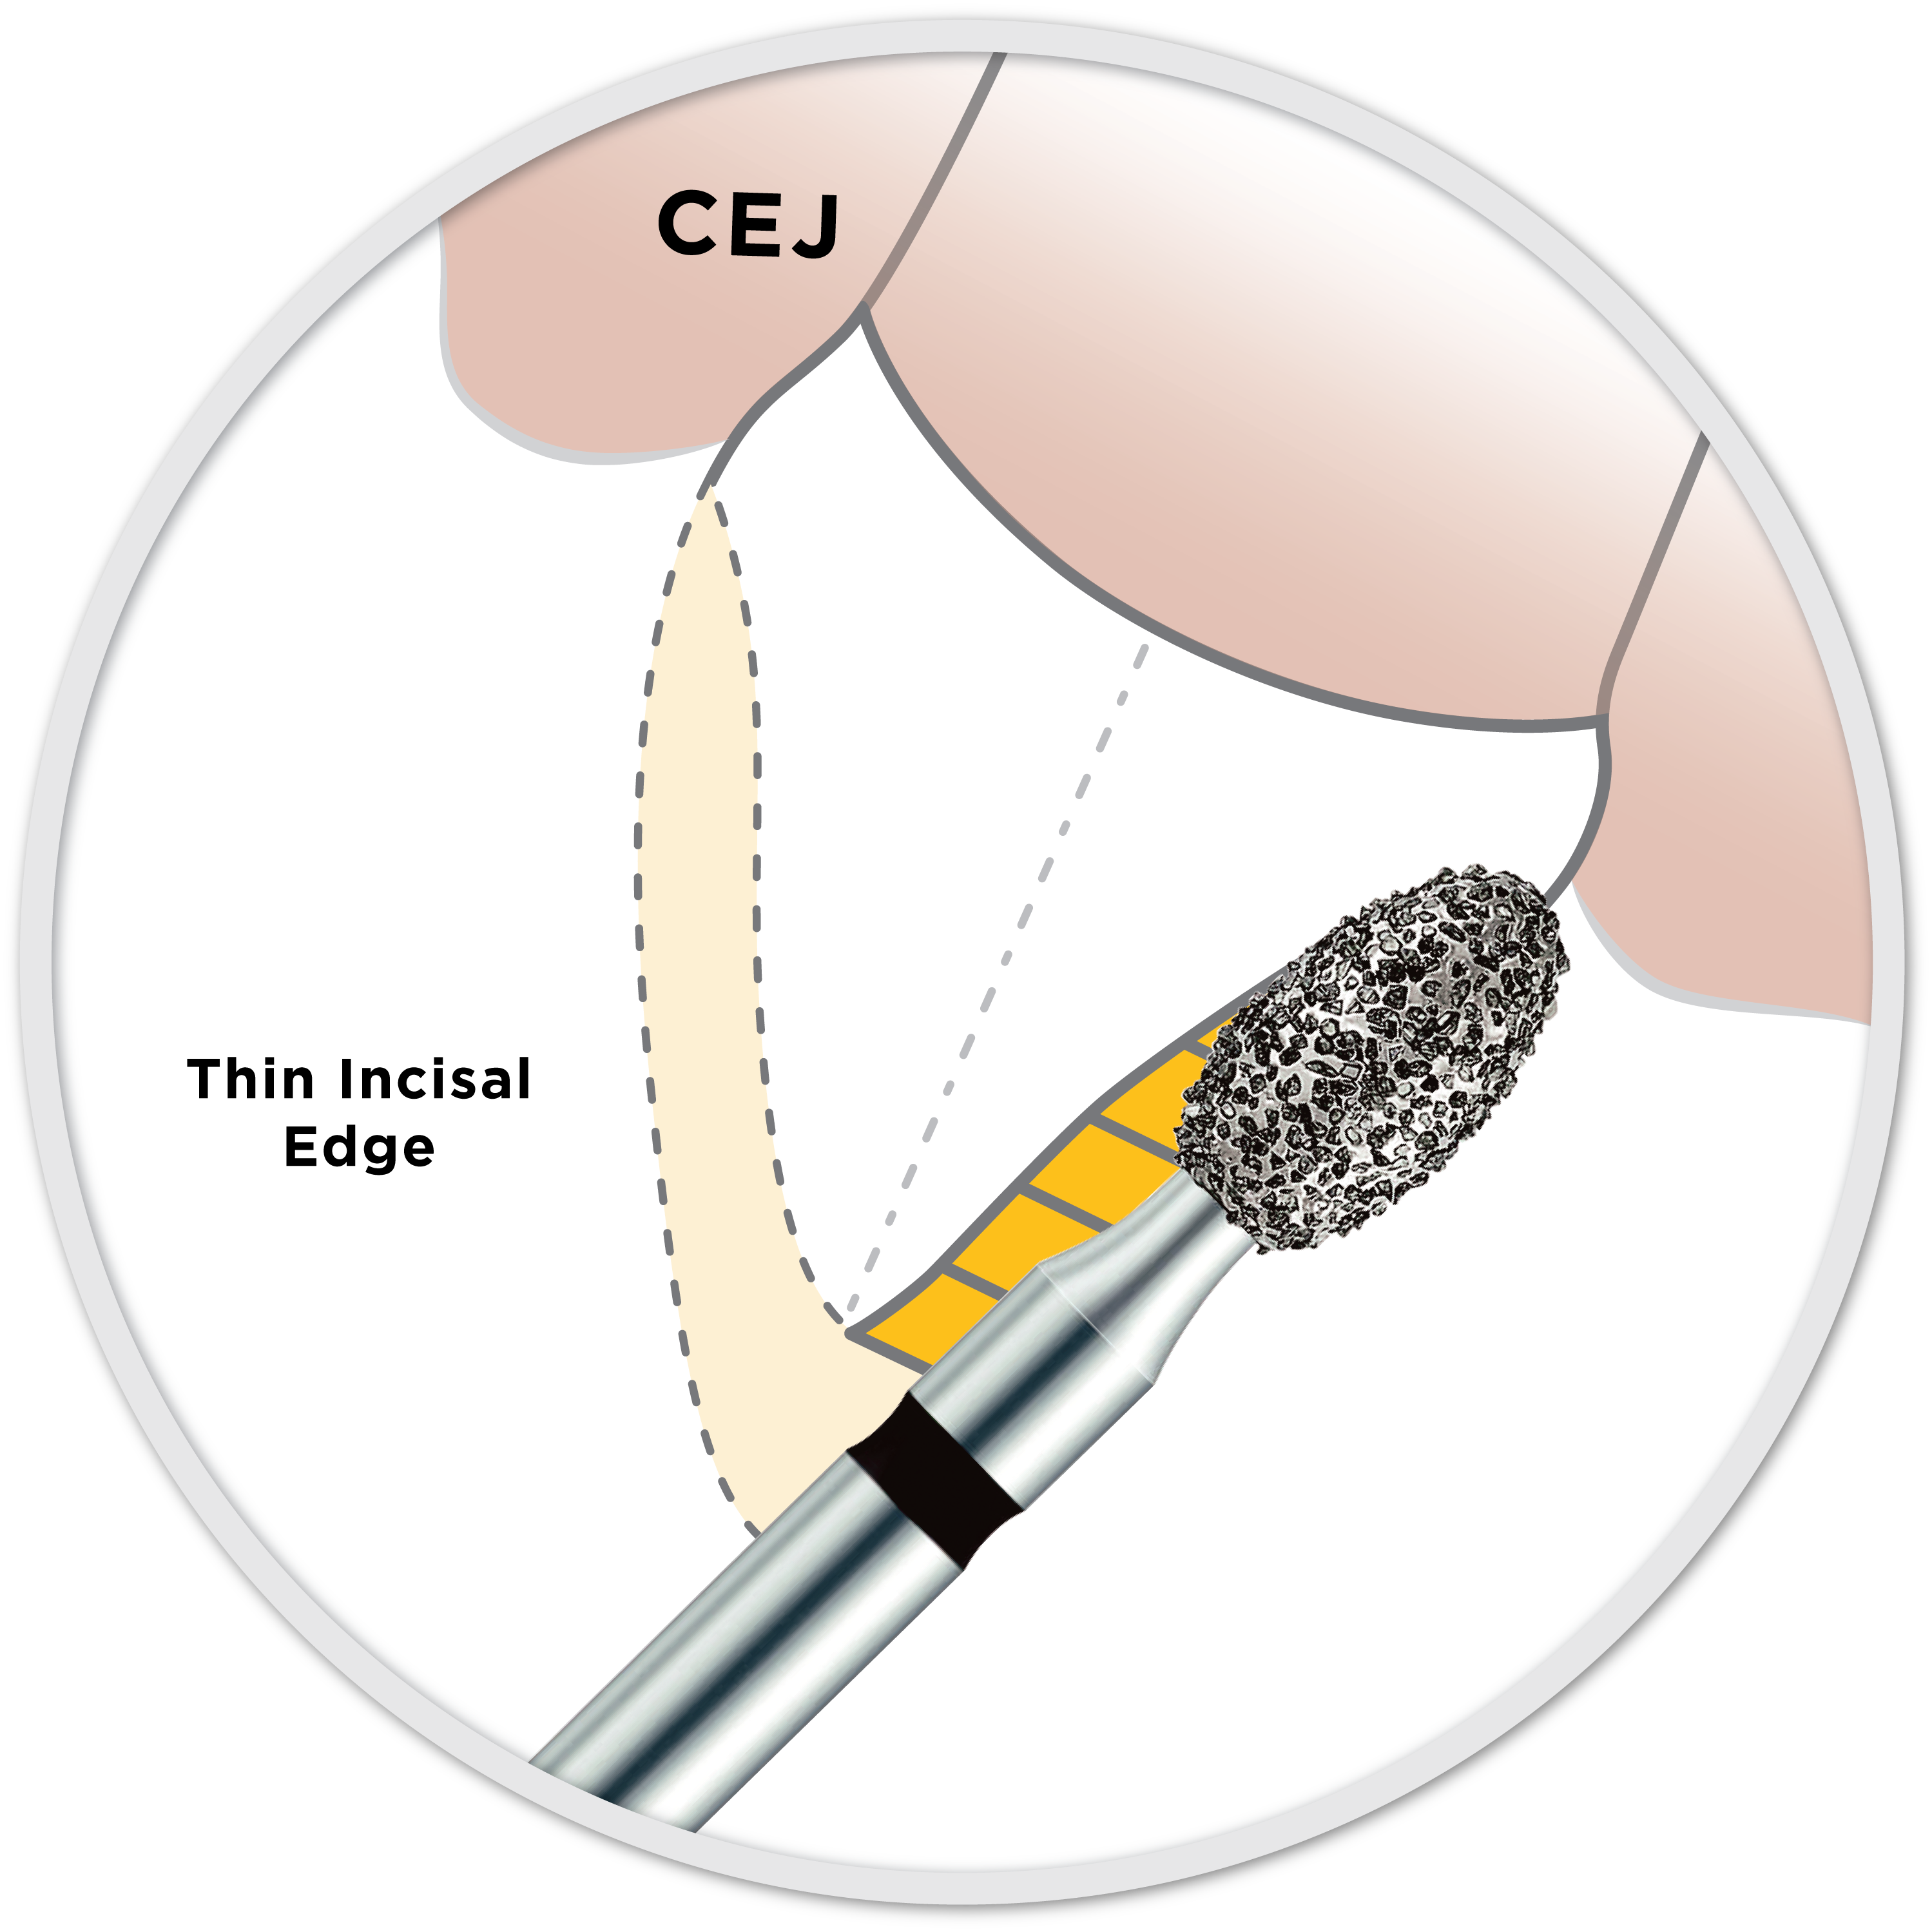
Supragingival axial reduction
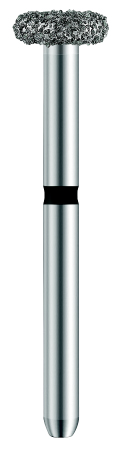
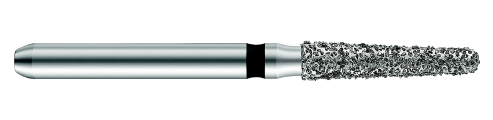
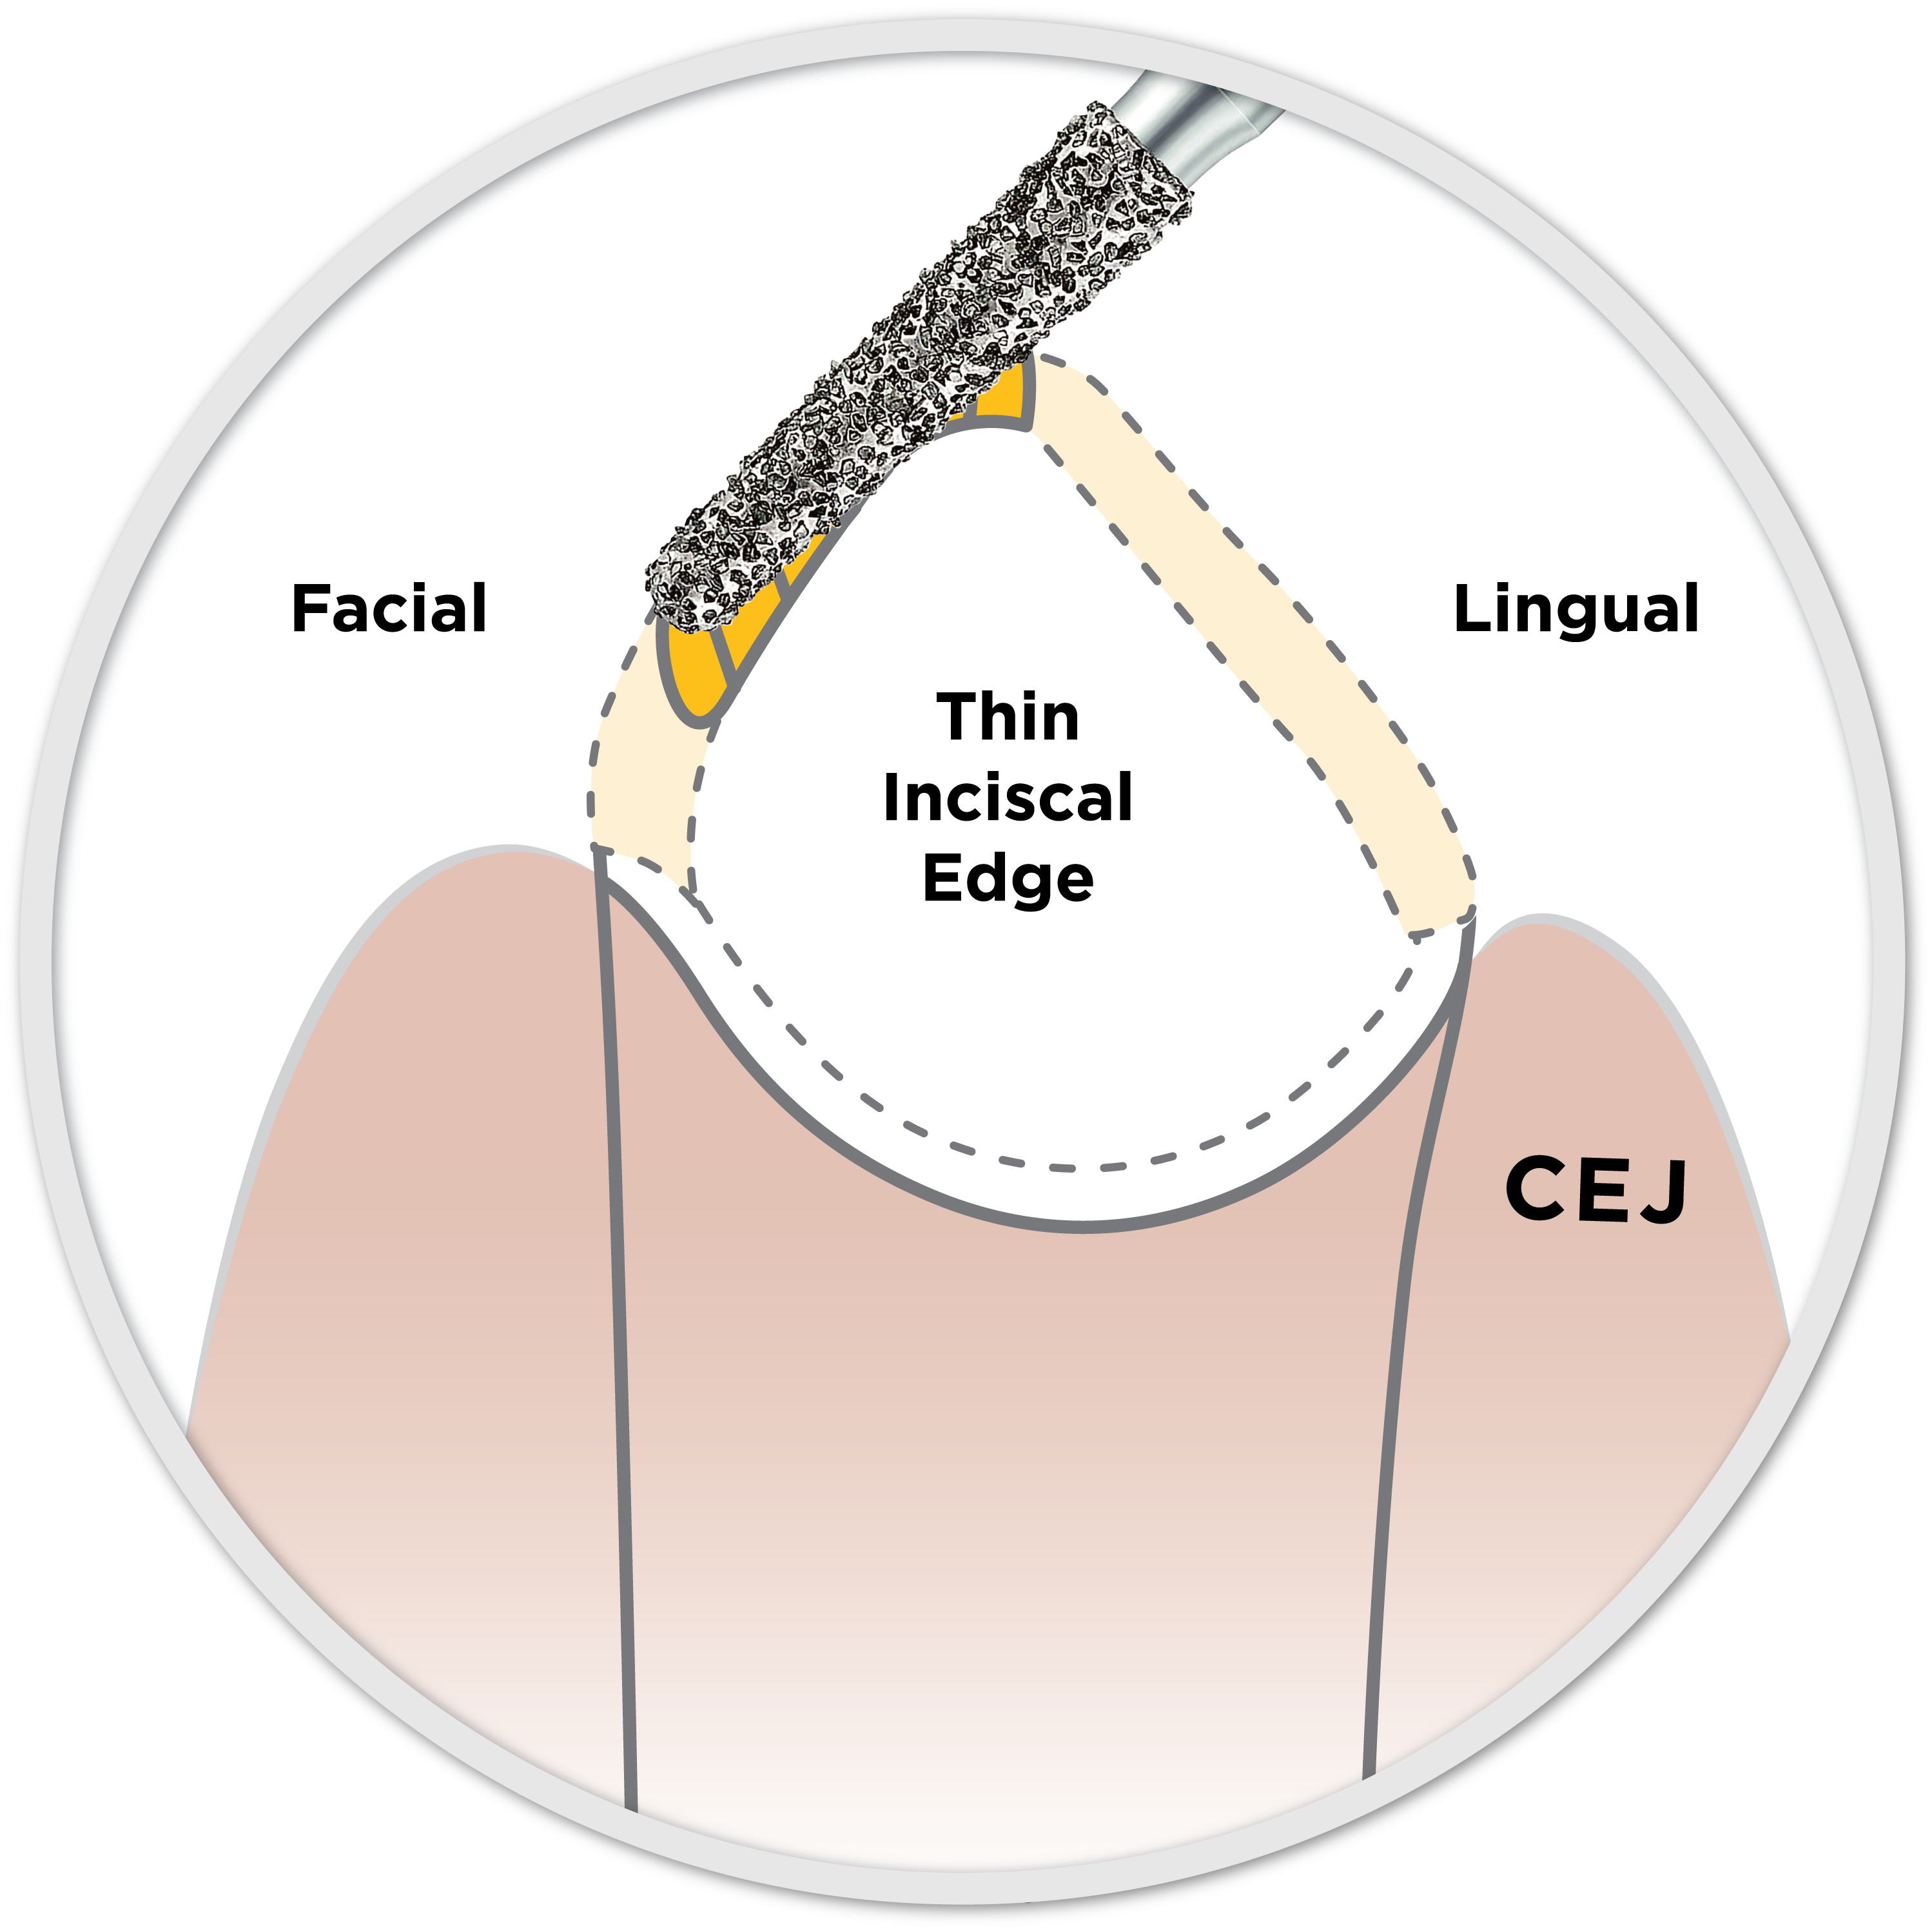
Using the EZPrep 002 Bur, create a chamfer margin at the gum line at least half the thickness of the bur tip around the entire tooth. Taper the incisal half lingually to create a thin incisal edge.
Pro tip
To prevent your crown from being labially inclined, adequate reduction in BOTH facial planes is critical. Viewing the prep from the incisal, make sure that the facial-incisal edge is behind the facial plane of the adjacent tooth.
Checkpoint
A “racetrack” should be easily identifiable around the entire prep at a quick glance. If not, prep more: “Ring-around-the-rosy” five times.
The incisal edge of the prep should match the arch form.

Lingual reduction
Remove the cingulum and 0.75—1.25mm of lingual enamel. Once the initial reduction is finished, then go back to create a thin incisal edge that matches the arch form.
Pro tip
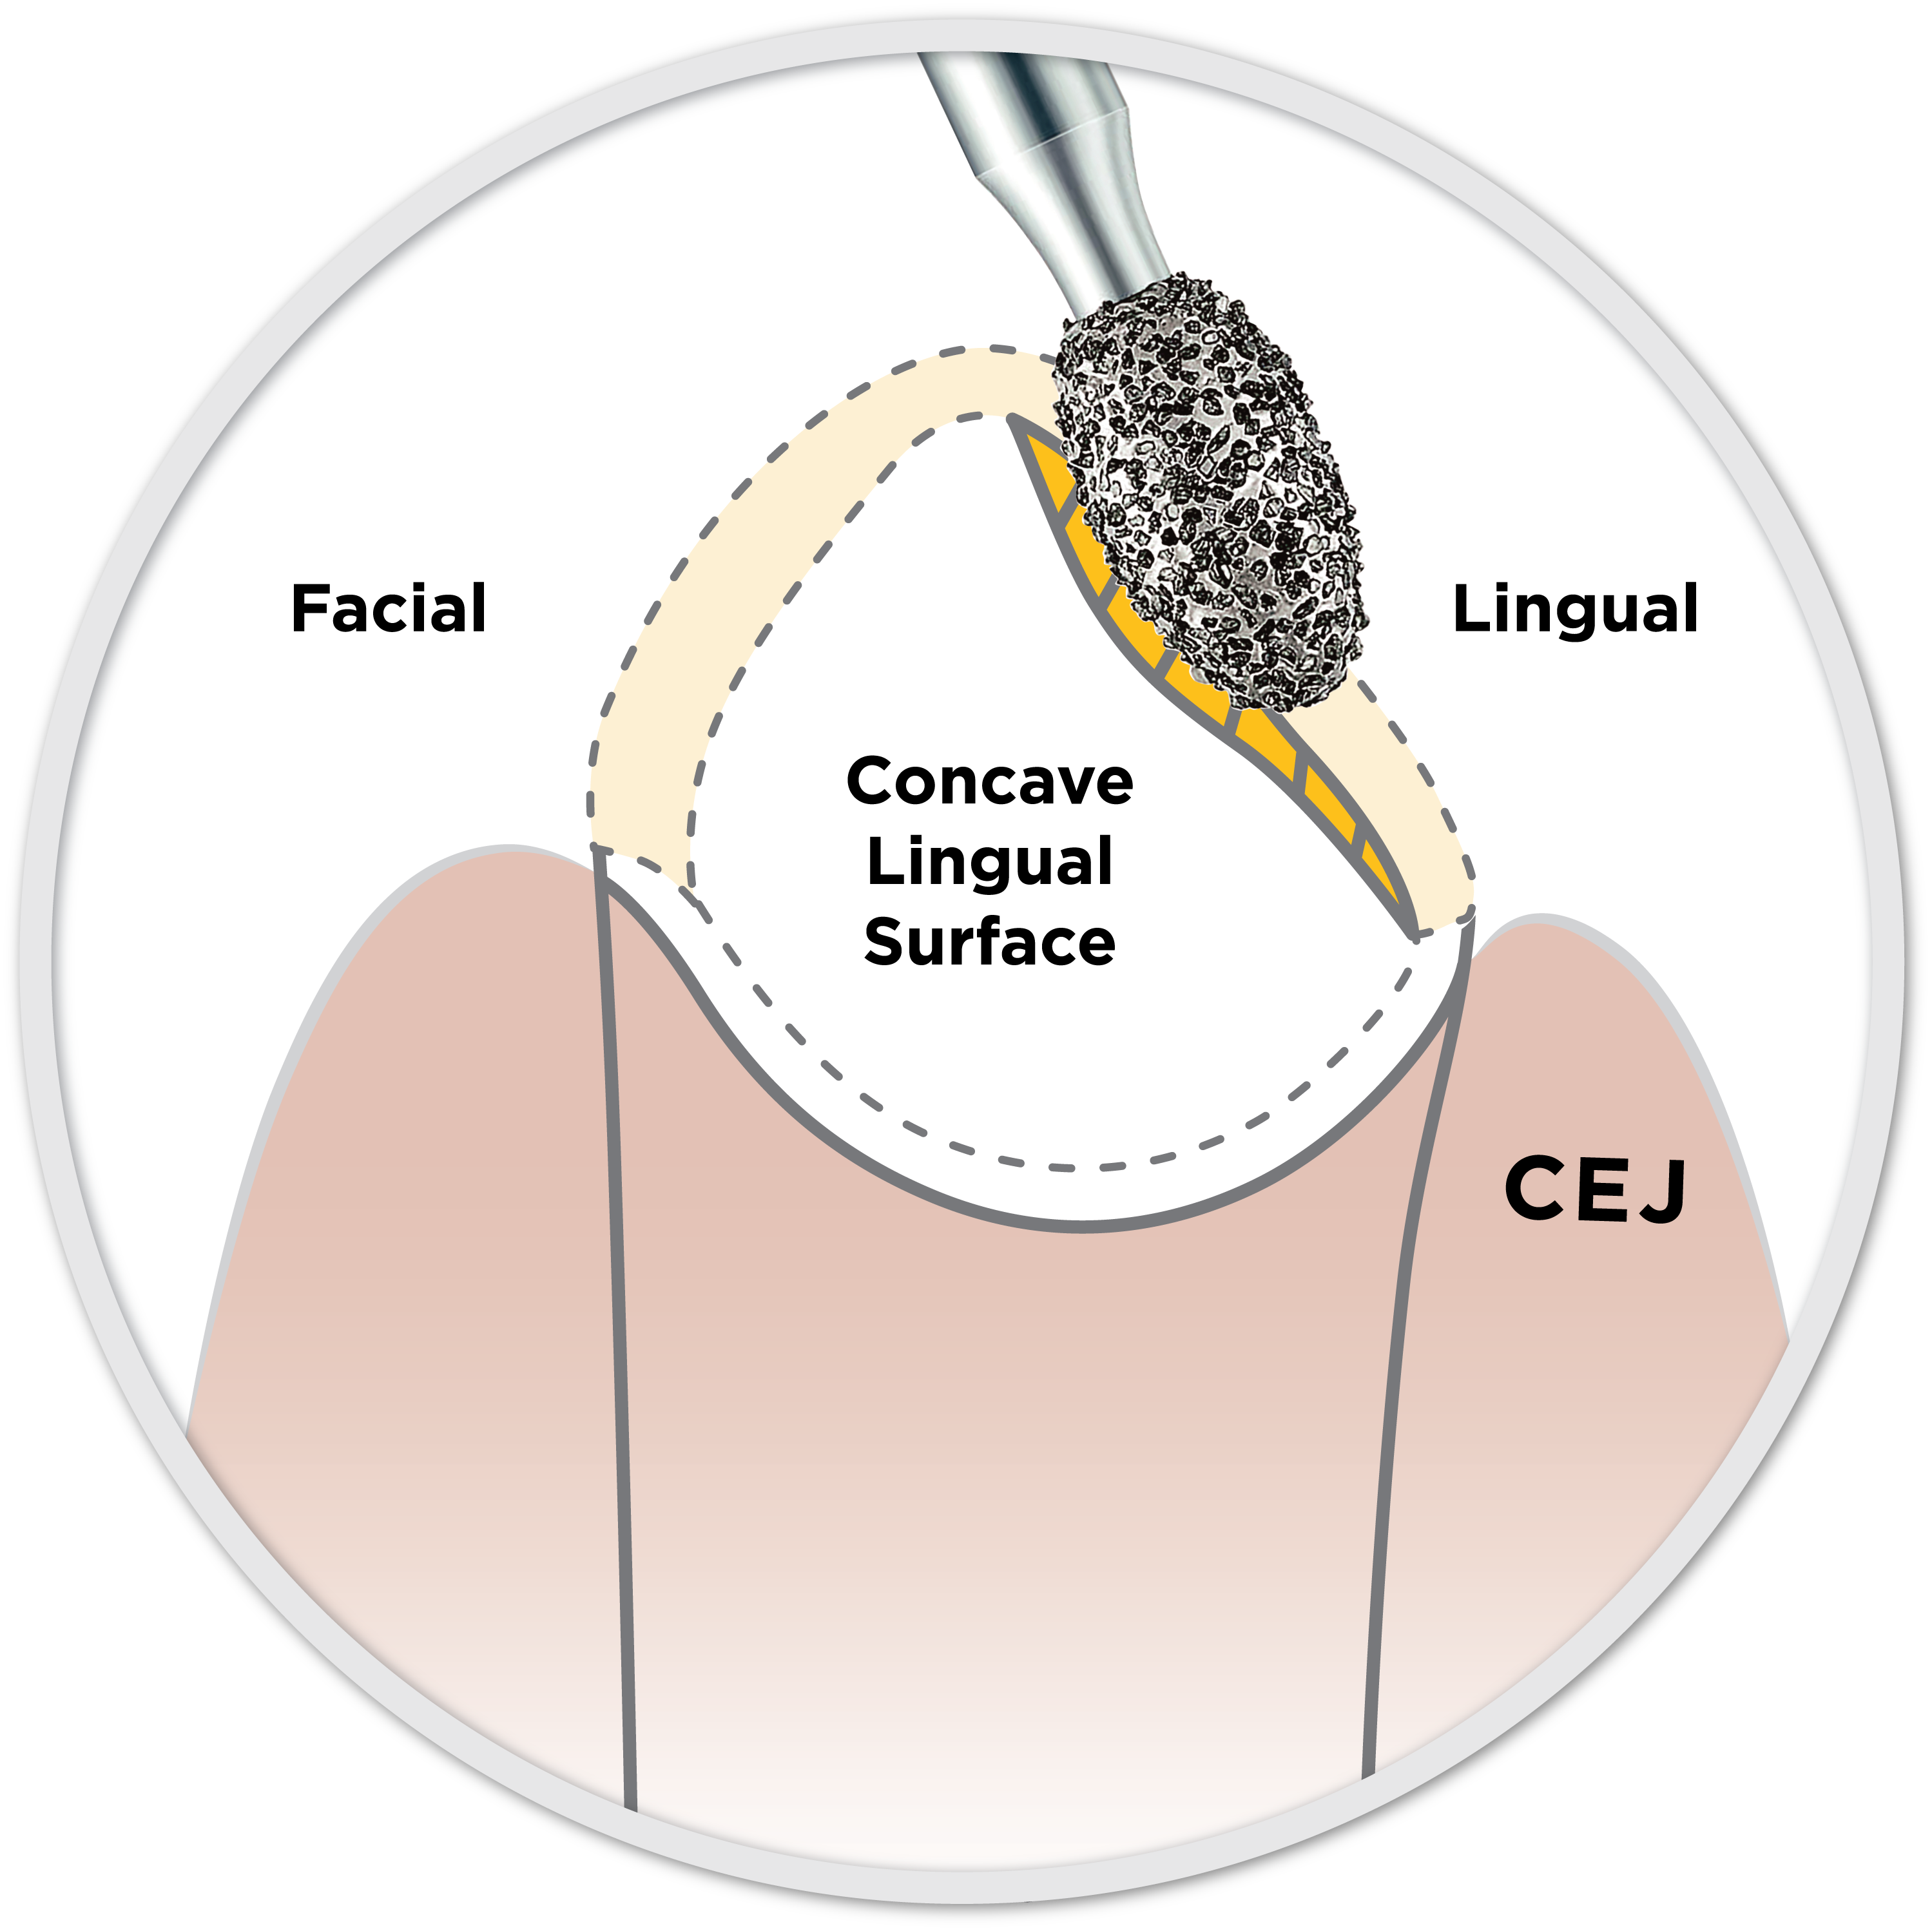
While aggressive lingual reduction is not necessary to seat the crown after this step, the lingual surface of the prep should appear concave and extend all the way from the incisal edge to the tissue.
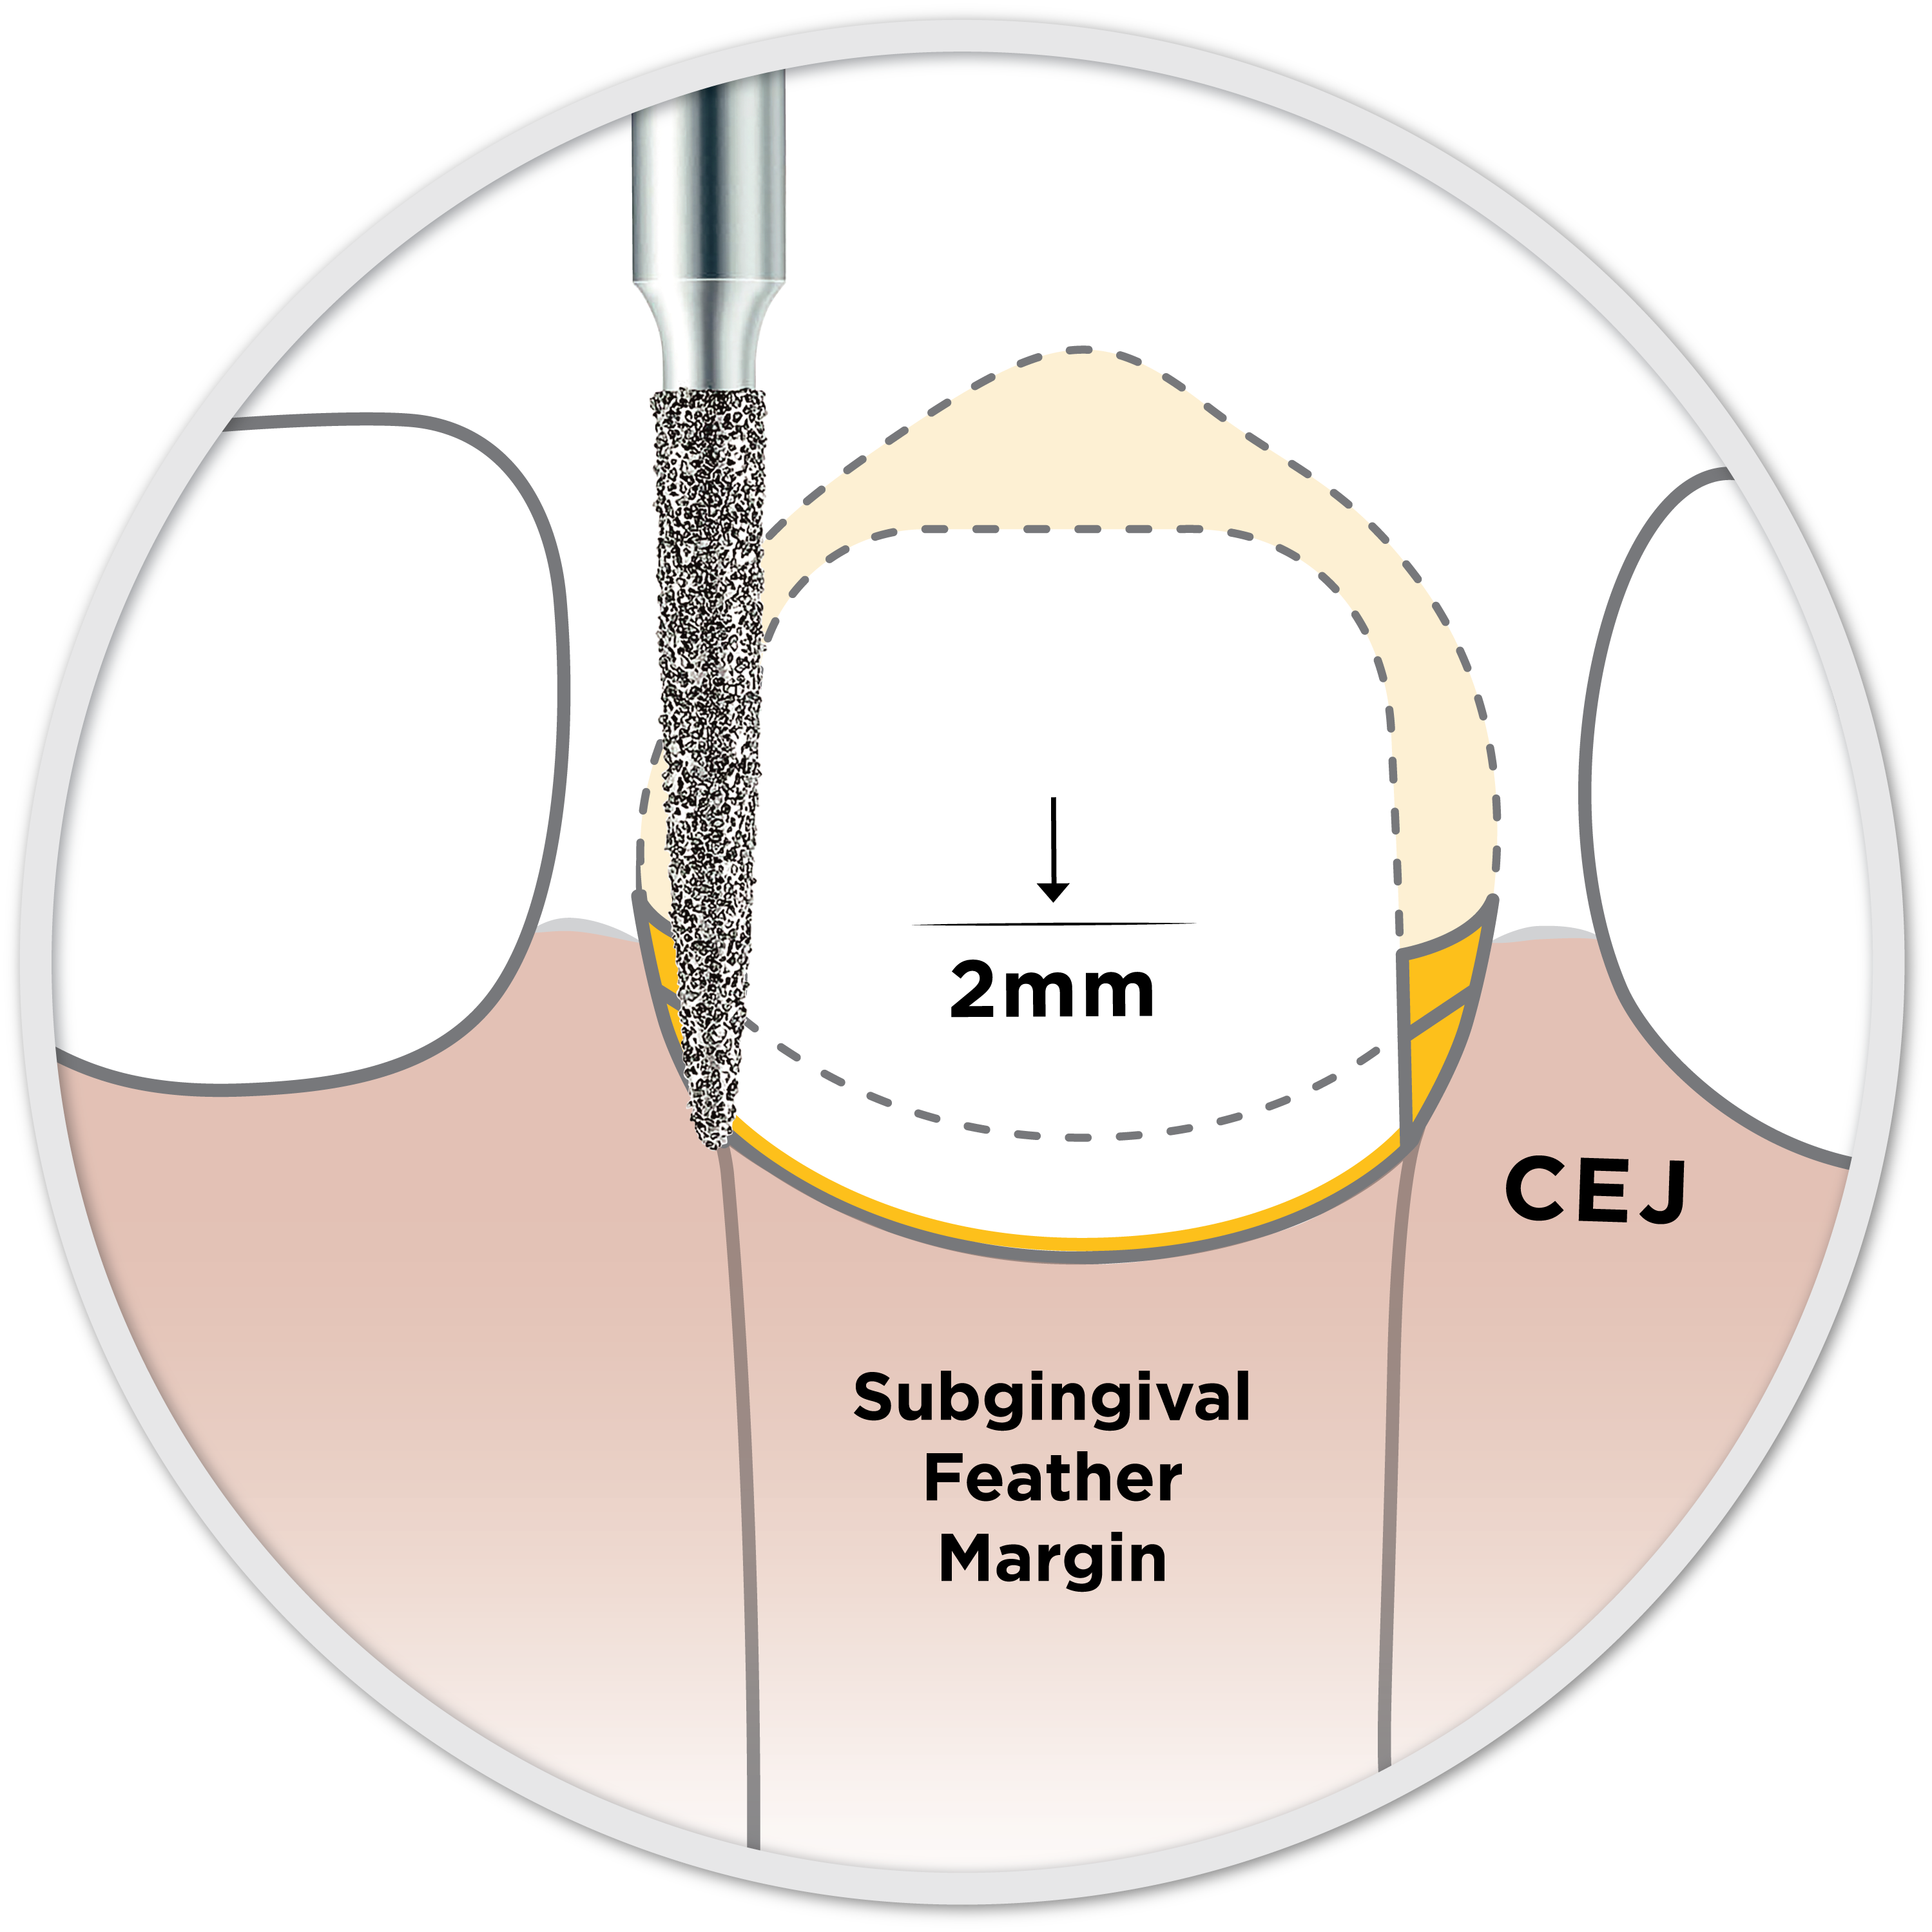
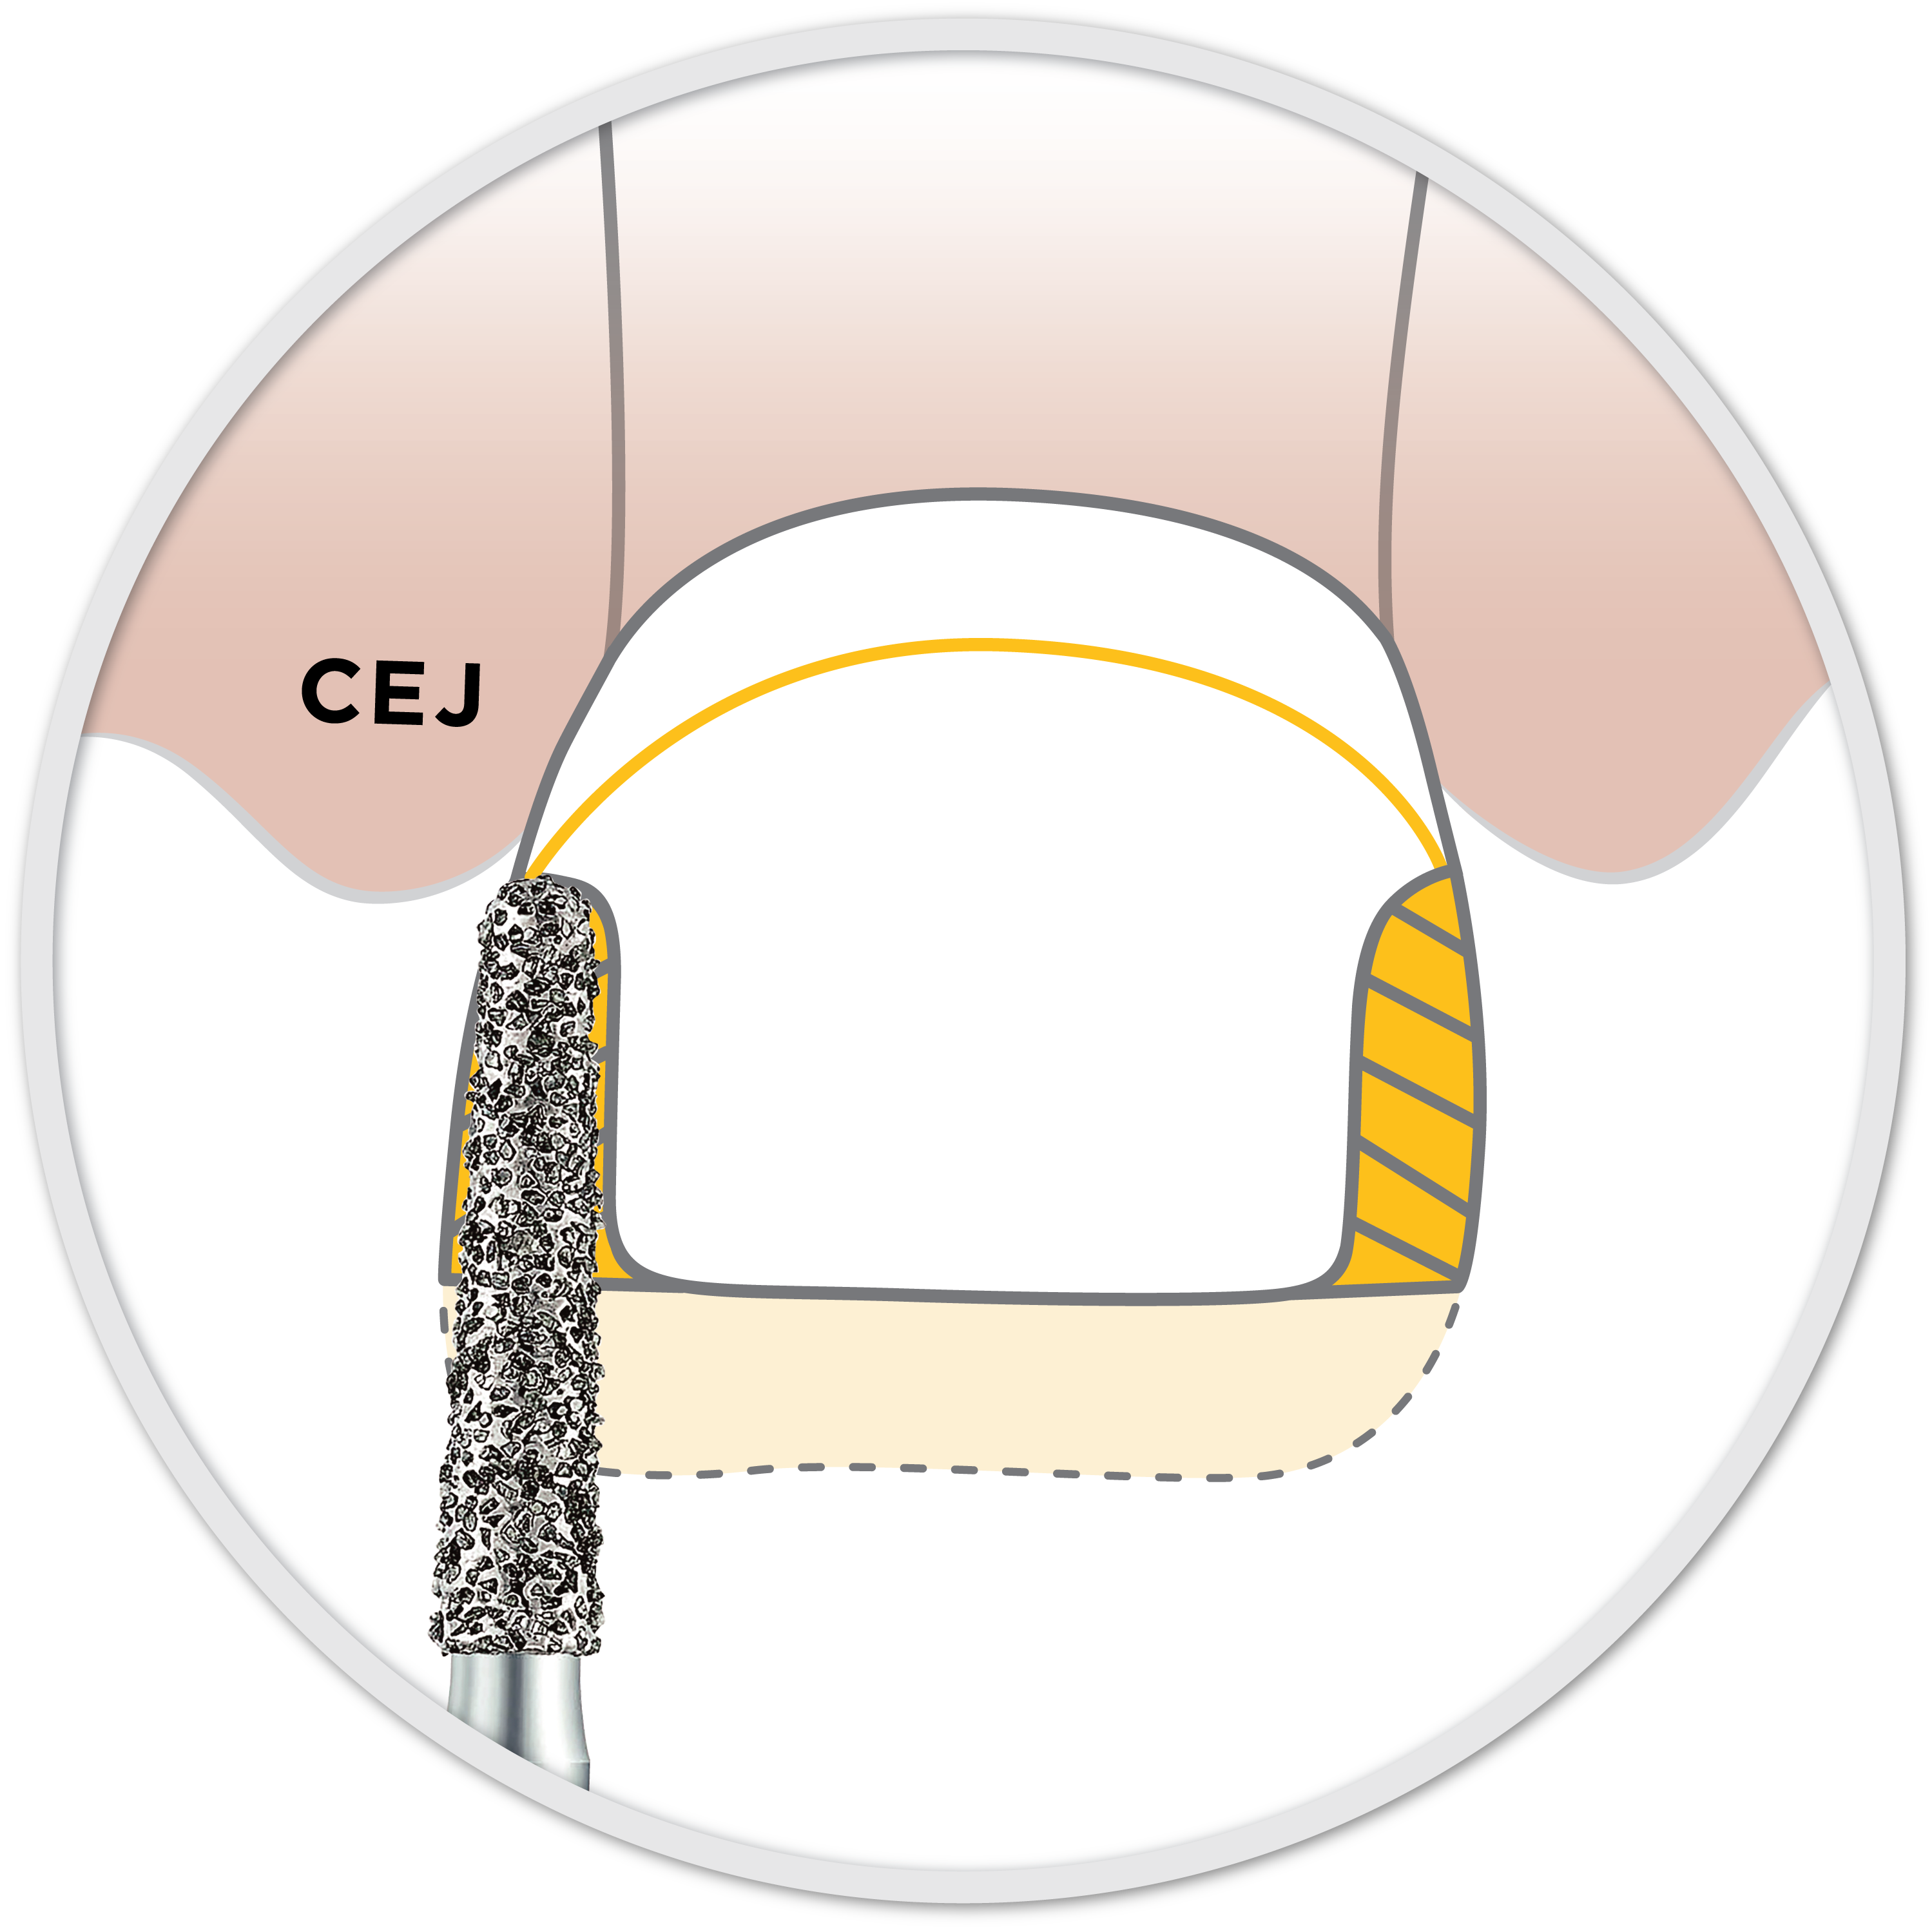
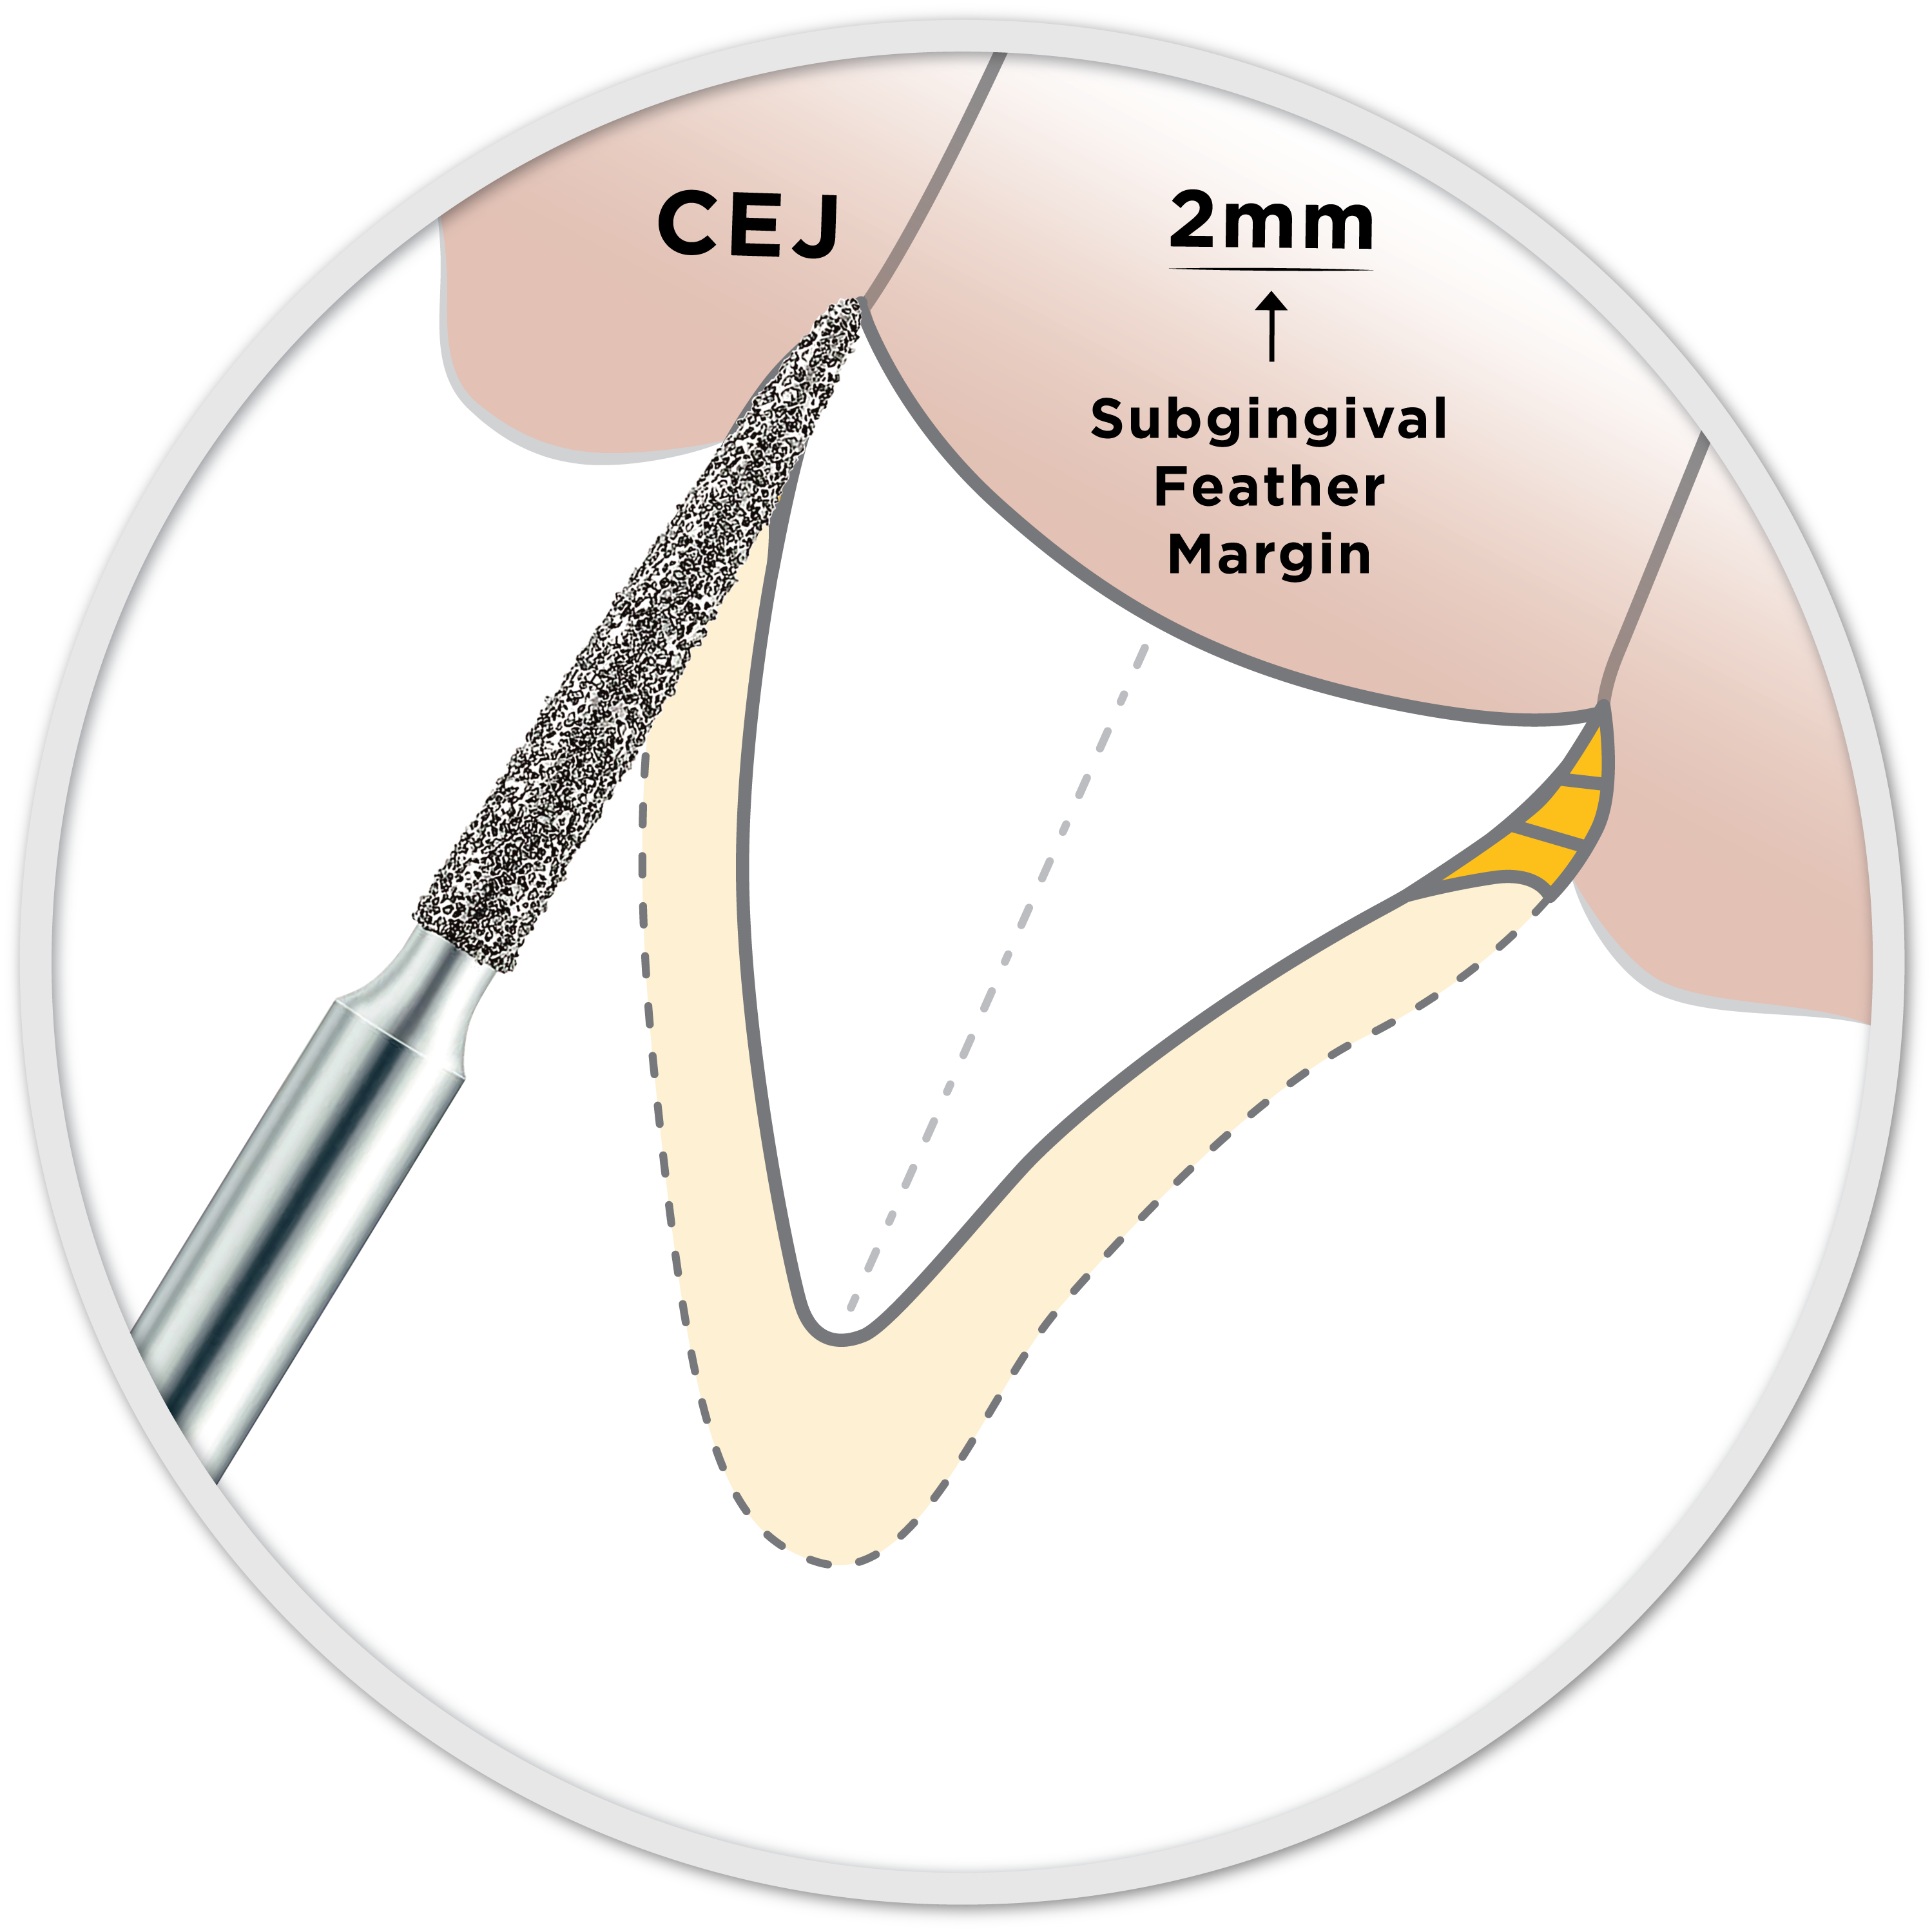
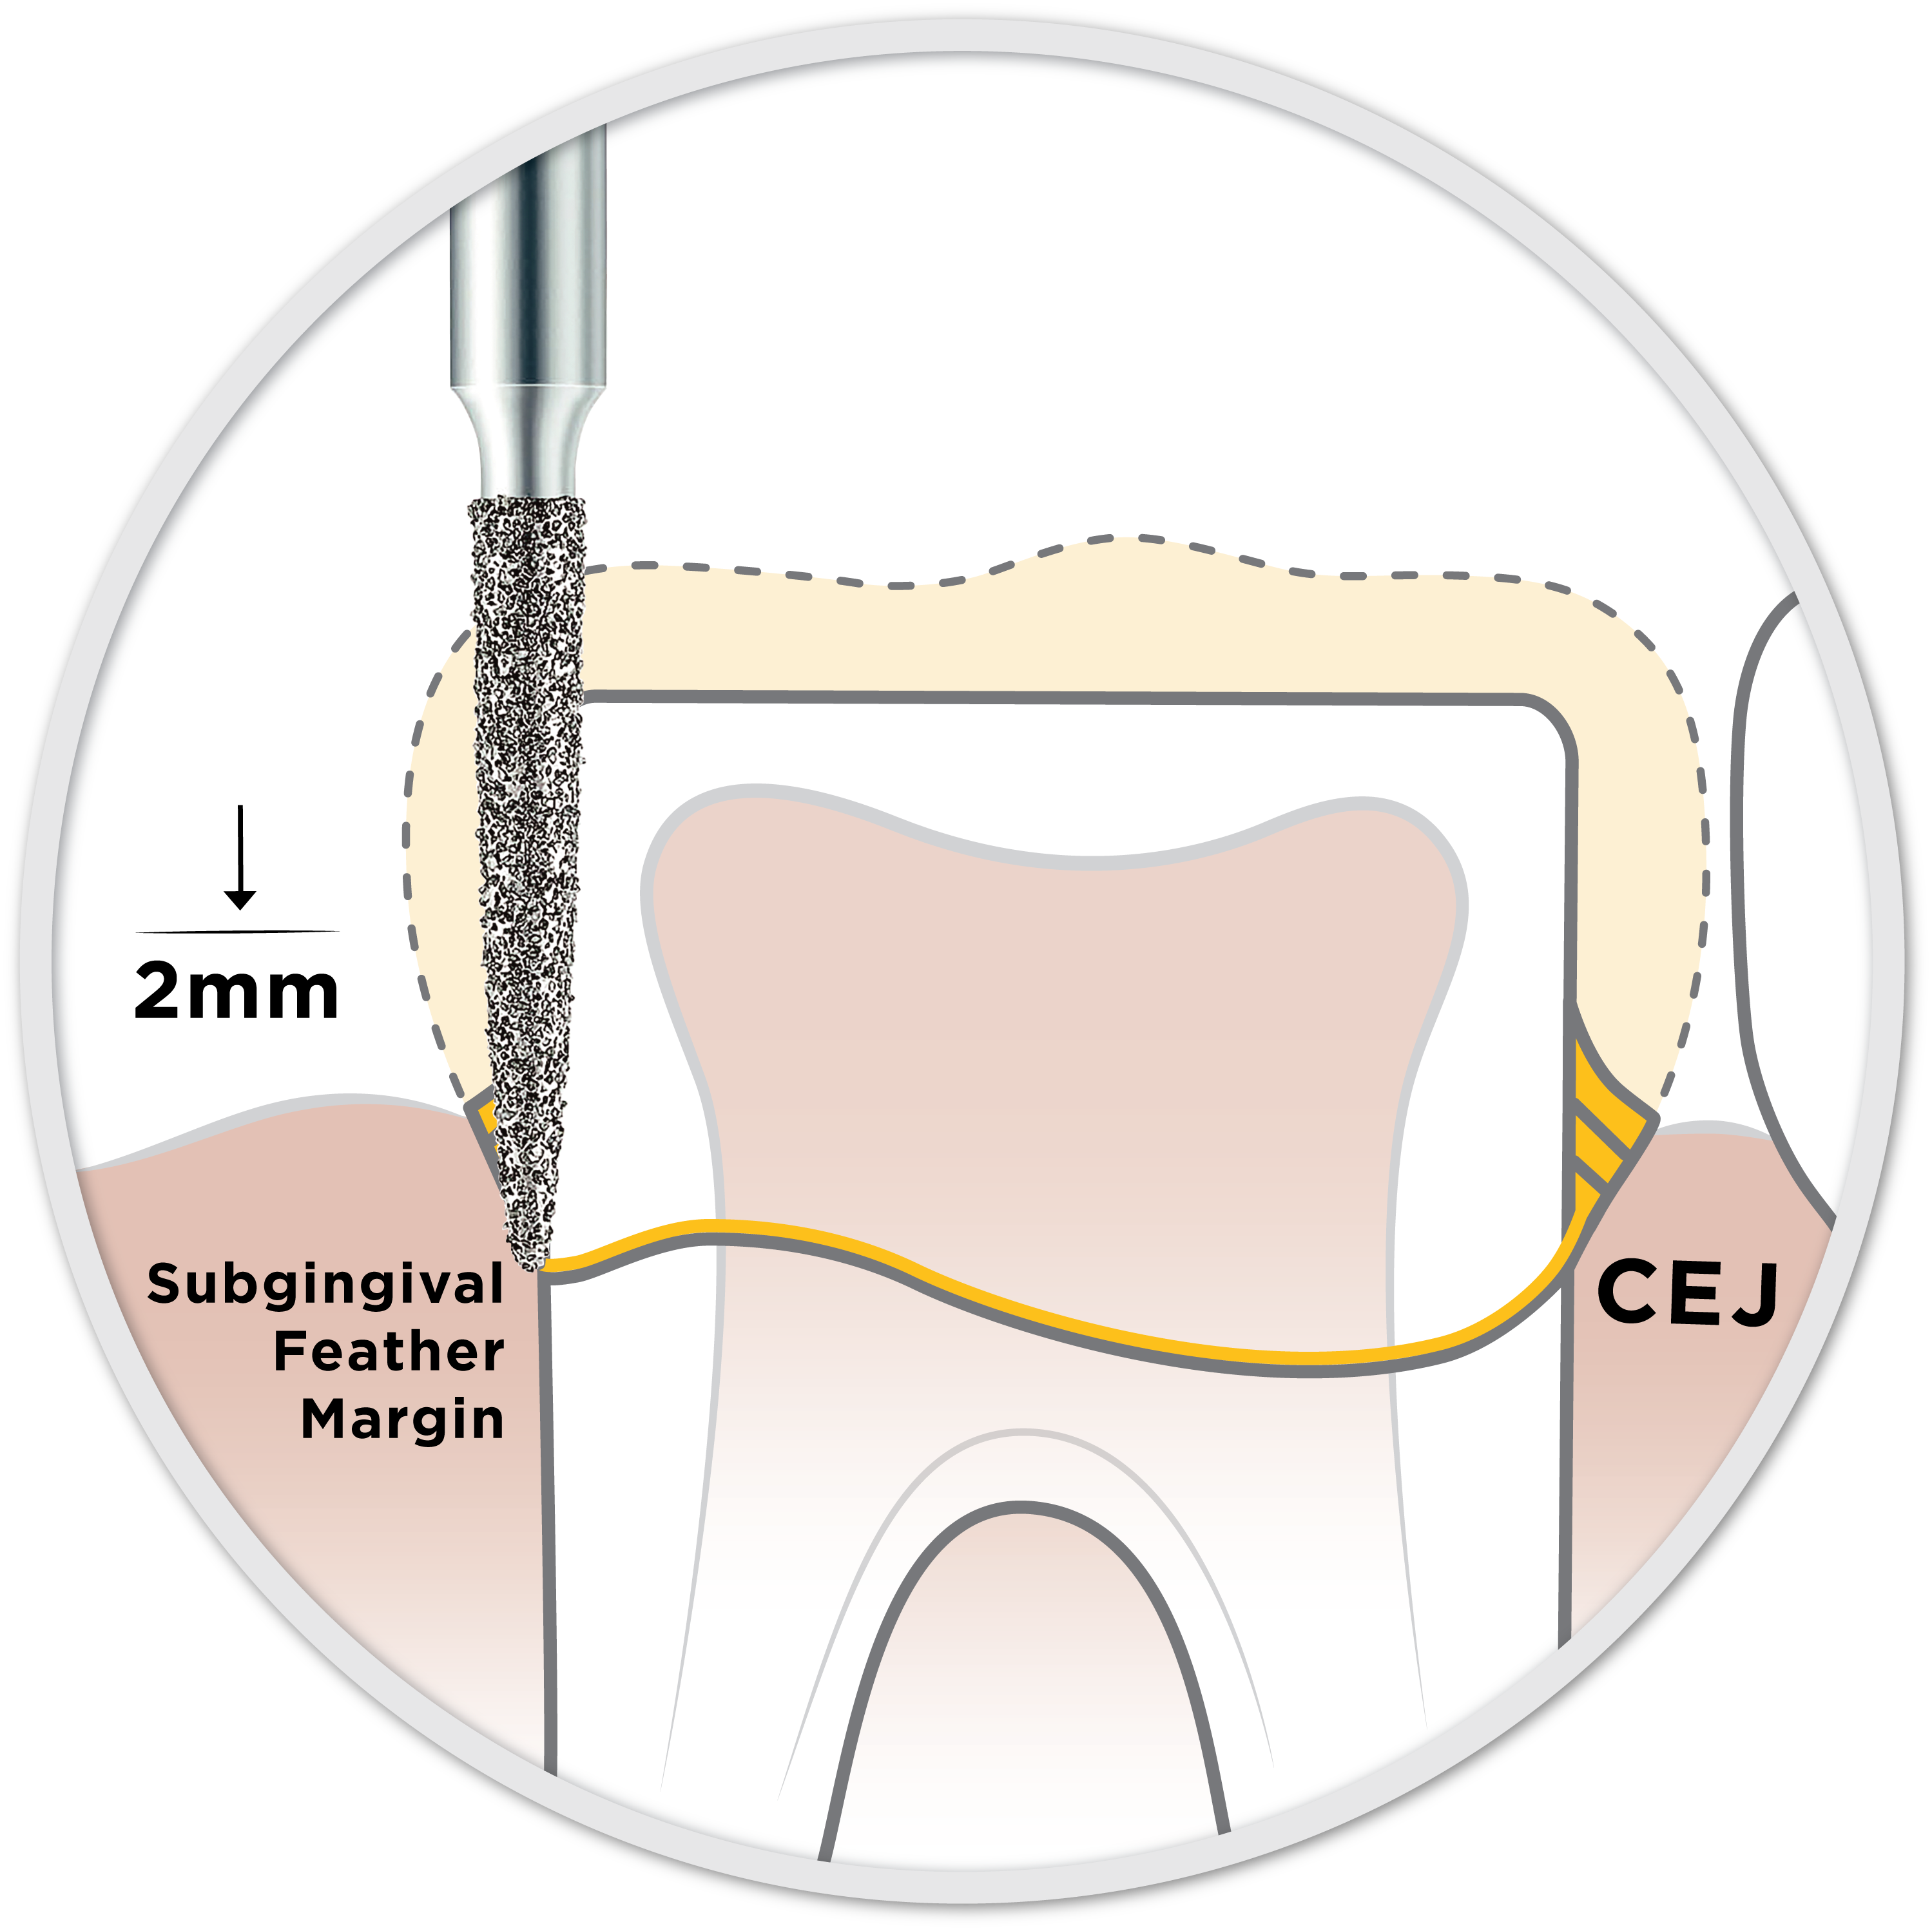
Subgingival axial reduction
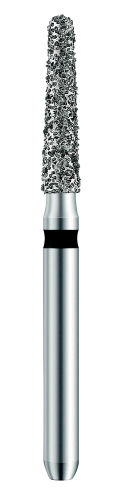
Remove the chamfer margin. Once the chamfer margin is gone, extend the tip of the bur the full 2.0mm subgingivally while hugging the bur axially along the root surface. Correct bur angulation is crucial!
Pro tip
The labial bulge must be completely removed to allow for a passive fit. In younger patients, this tooth structure may be hiding below the tissue line. Therefore, it is essential to extend the tip of the EZPrep 004 bur 1.5mm subgingivally.
Checkpoint
Ensure all subgingival ledges are removed by feeling root-to-tooth 360° using EZPrep 004 Bur or an explorer. Final prep should be a smooth cylinder. If the crown does not seat, repeat the “Ring-around-the-rosy” as needed.
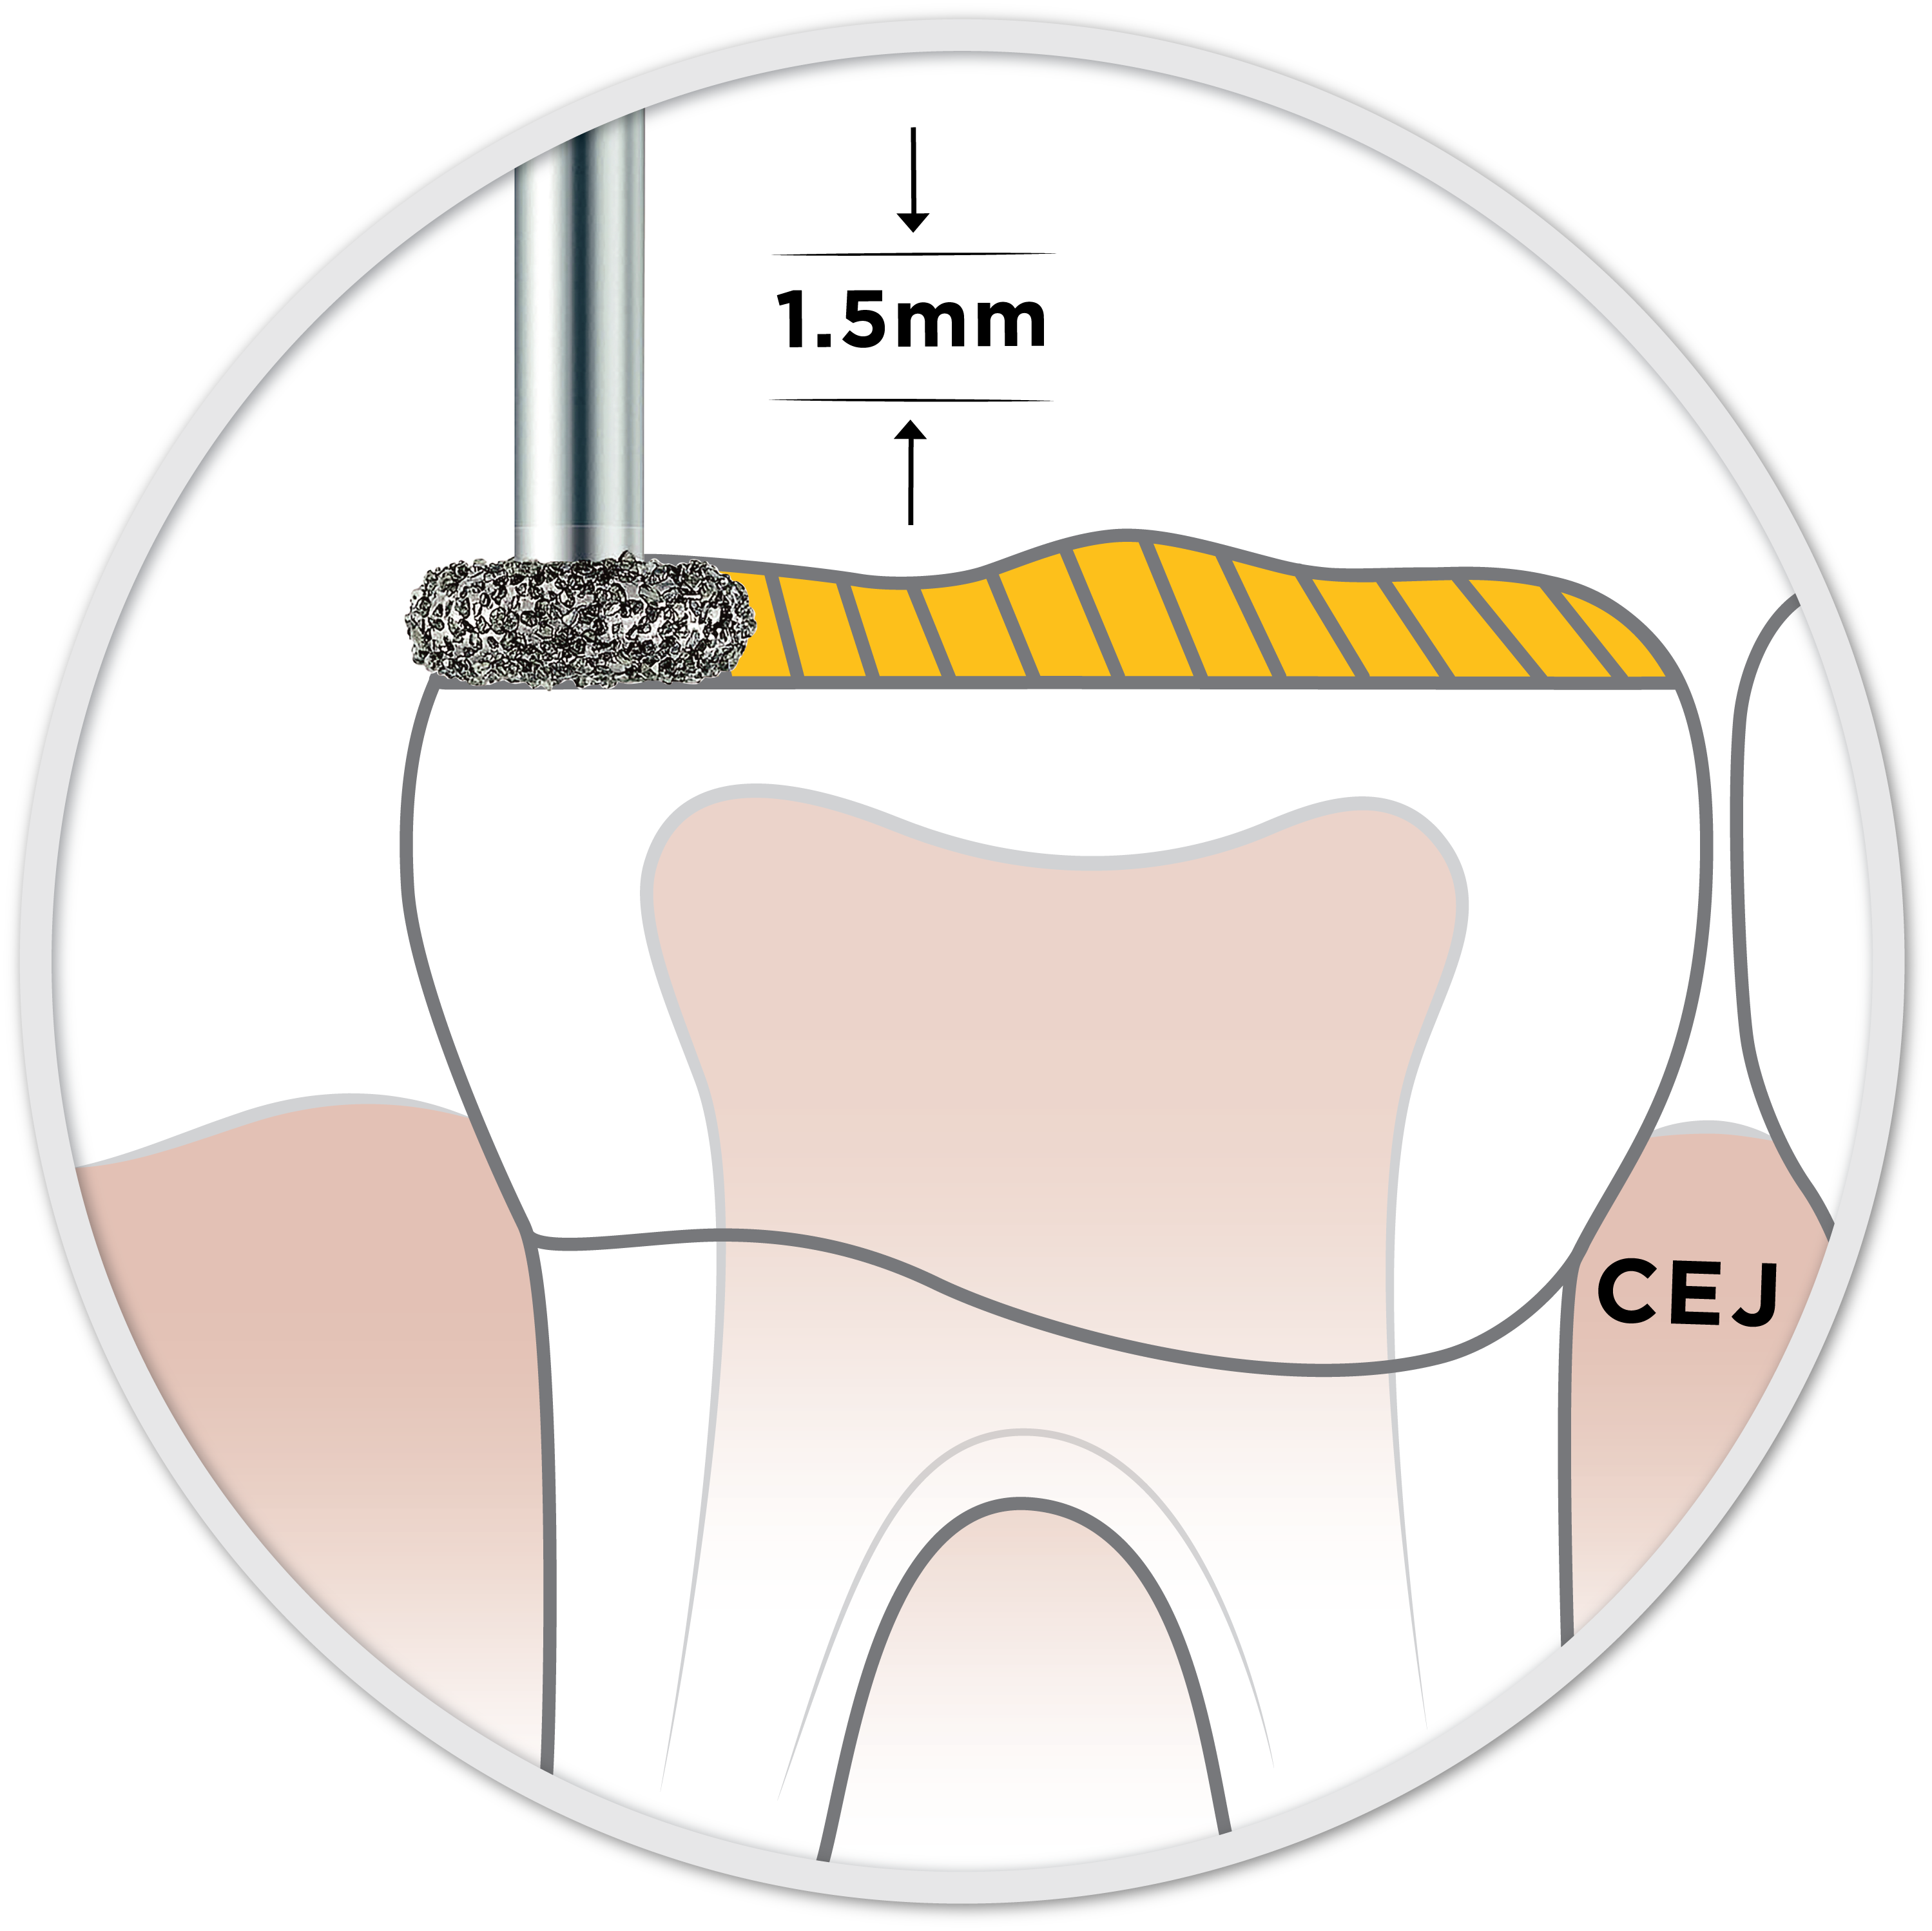
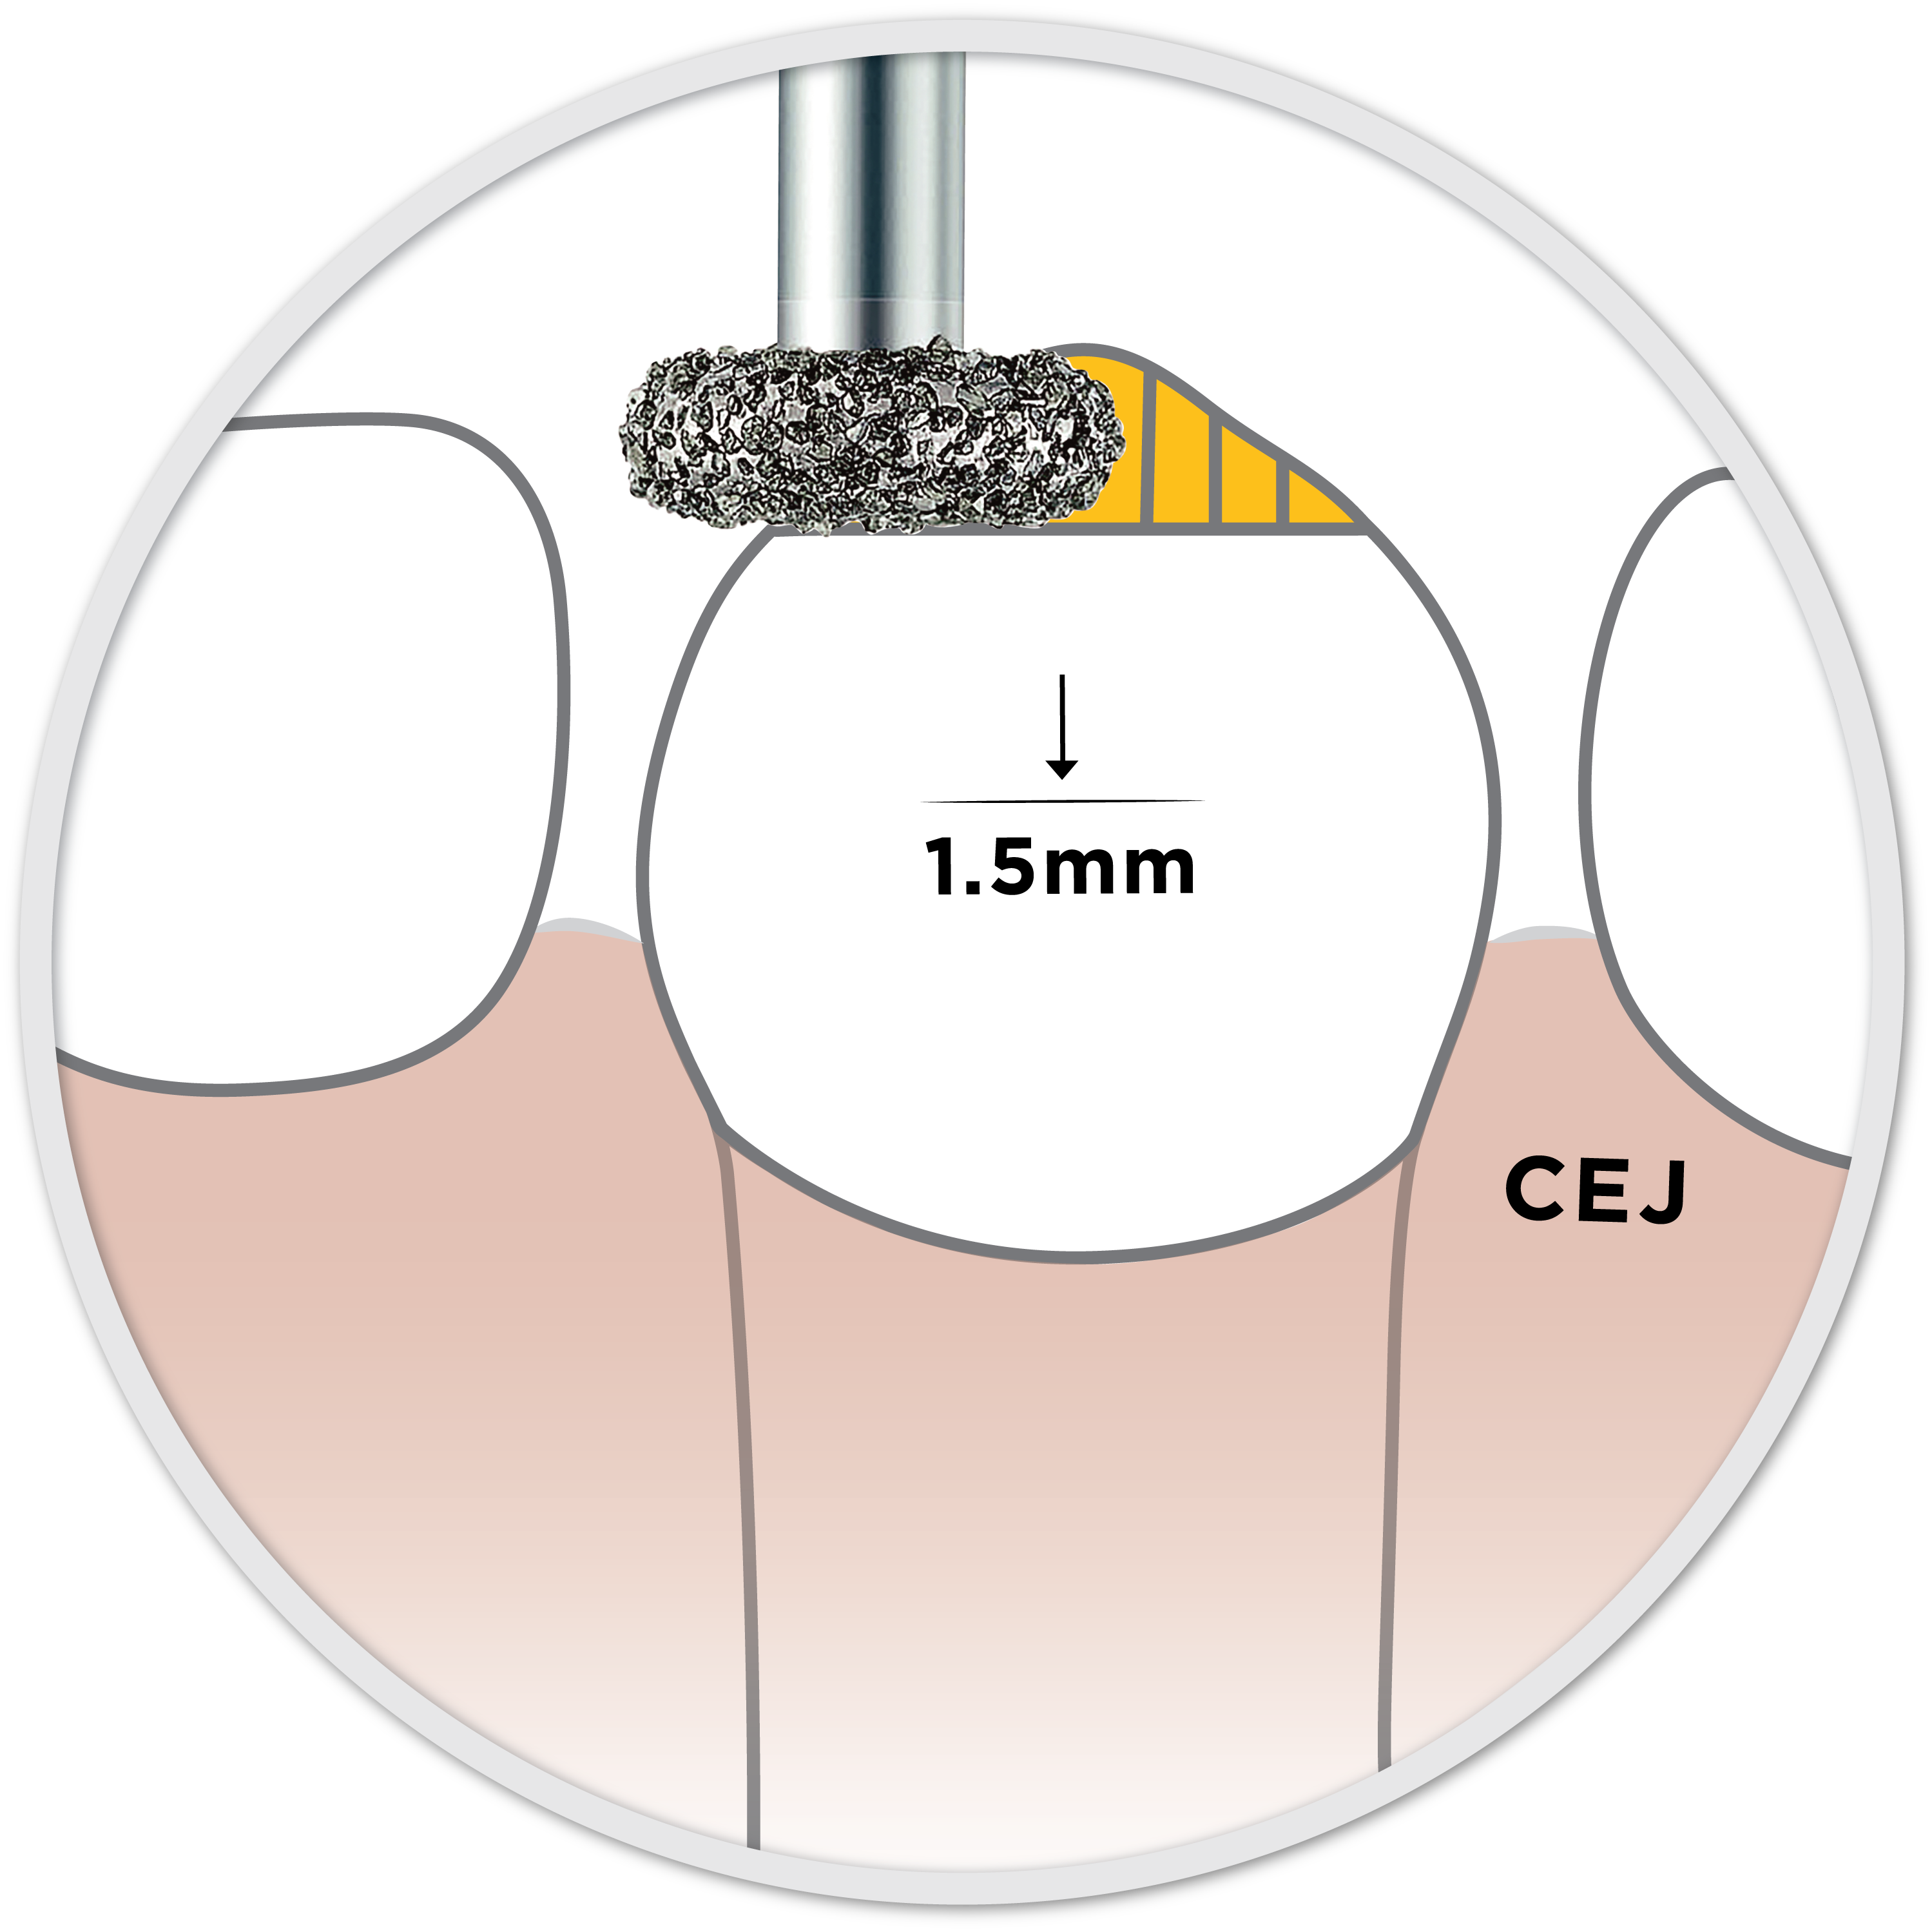
Occlusal reduction
The occlusal reduction is the full thickness of the EZPrep 001 Bur. The reduction should be 1.5mm. Use the marginal ridges of the adjacent teeth as a reference point.
Pro tip
If six-year molars have not erupted, go back and prep the distal half of the occlusal table of the second primary molars slightly more (up to 2mm). This adjustment will reduce the chance of the second molars’ occlusion being slightly high, particularly when doing crowns on opposing second molars.
Would you rather watch?
Posterior
Single unit preparation: S
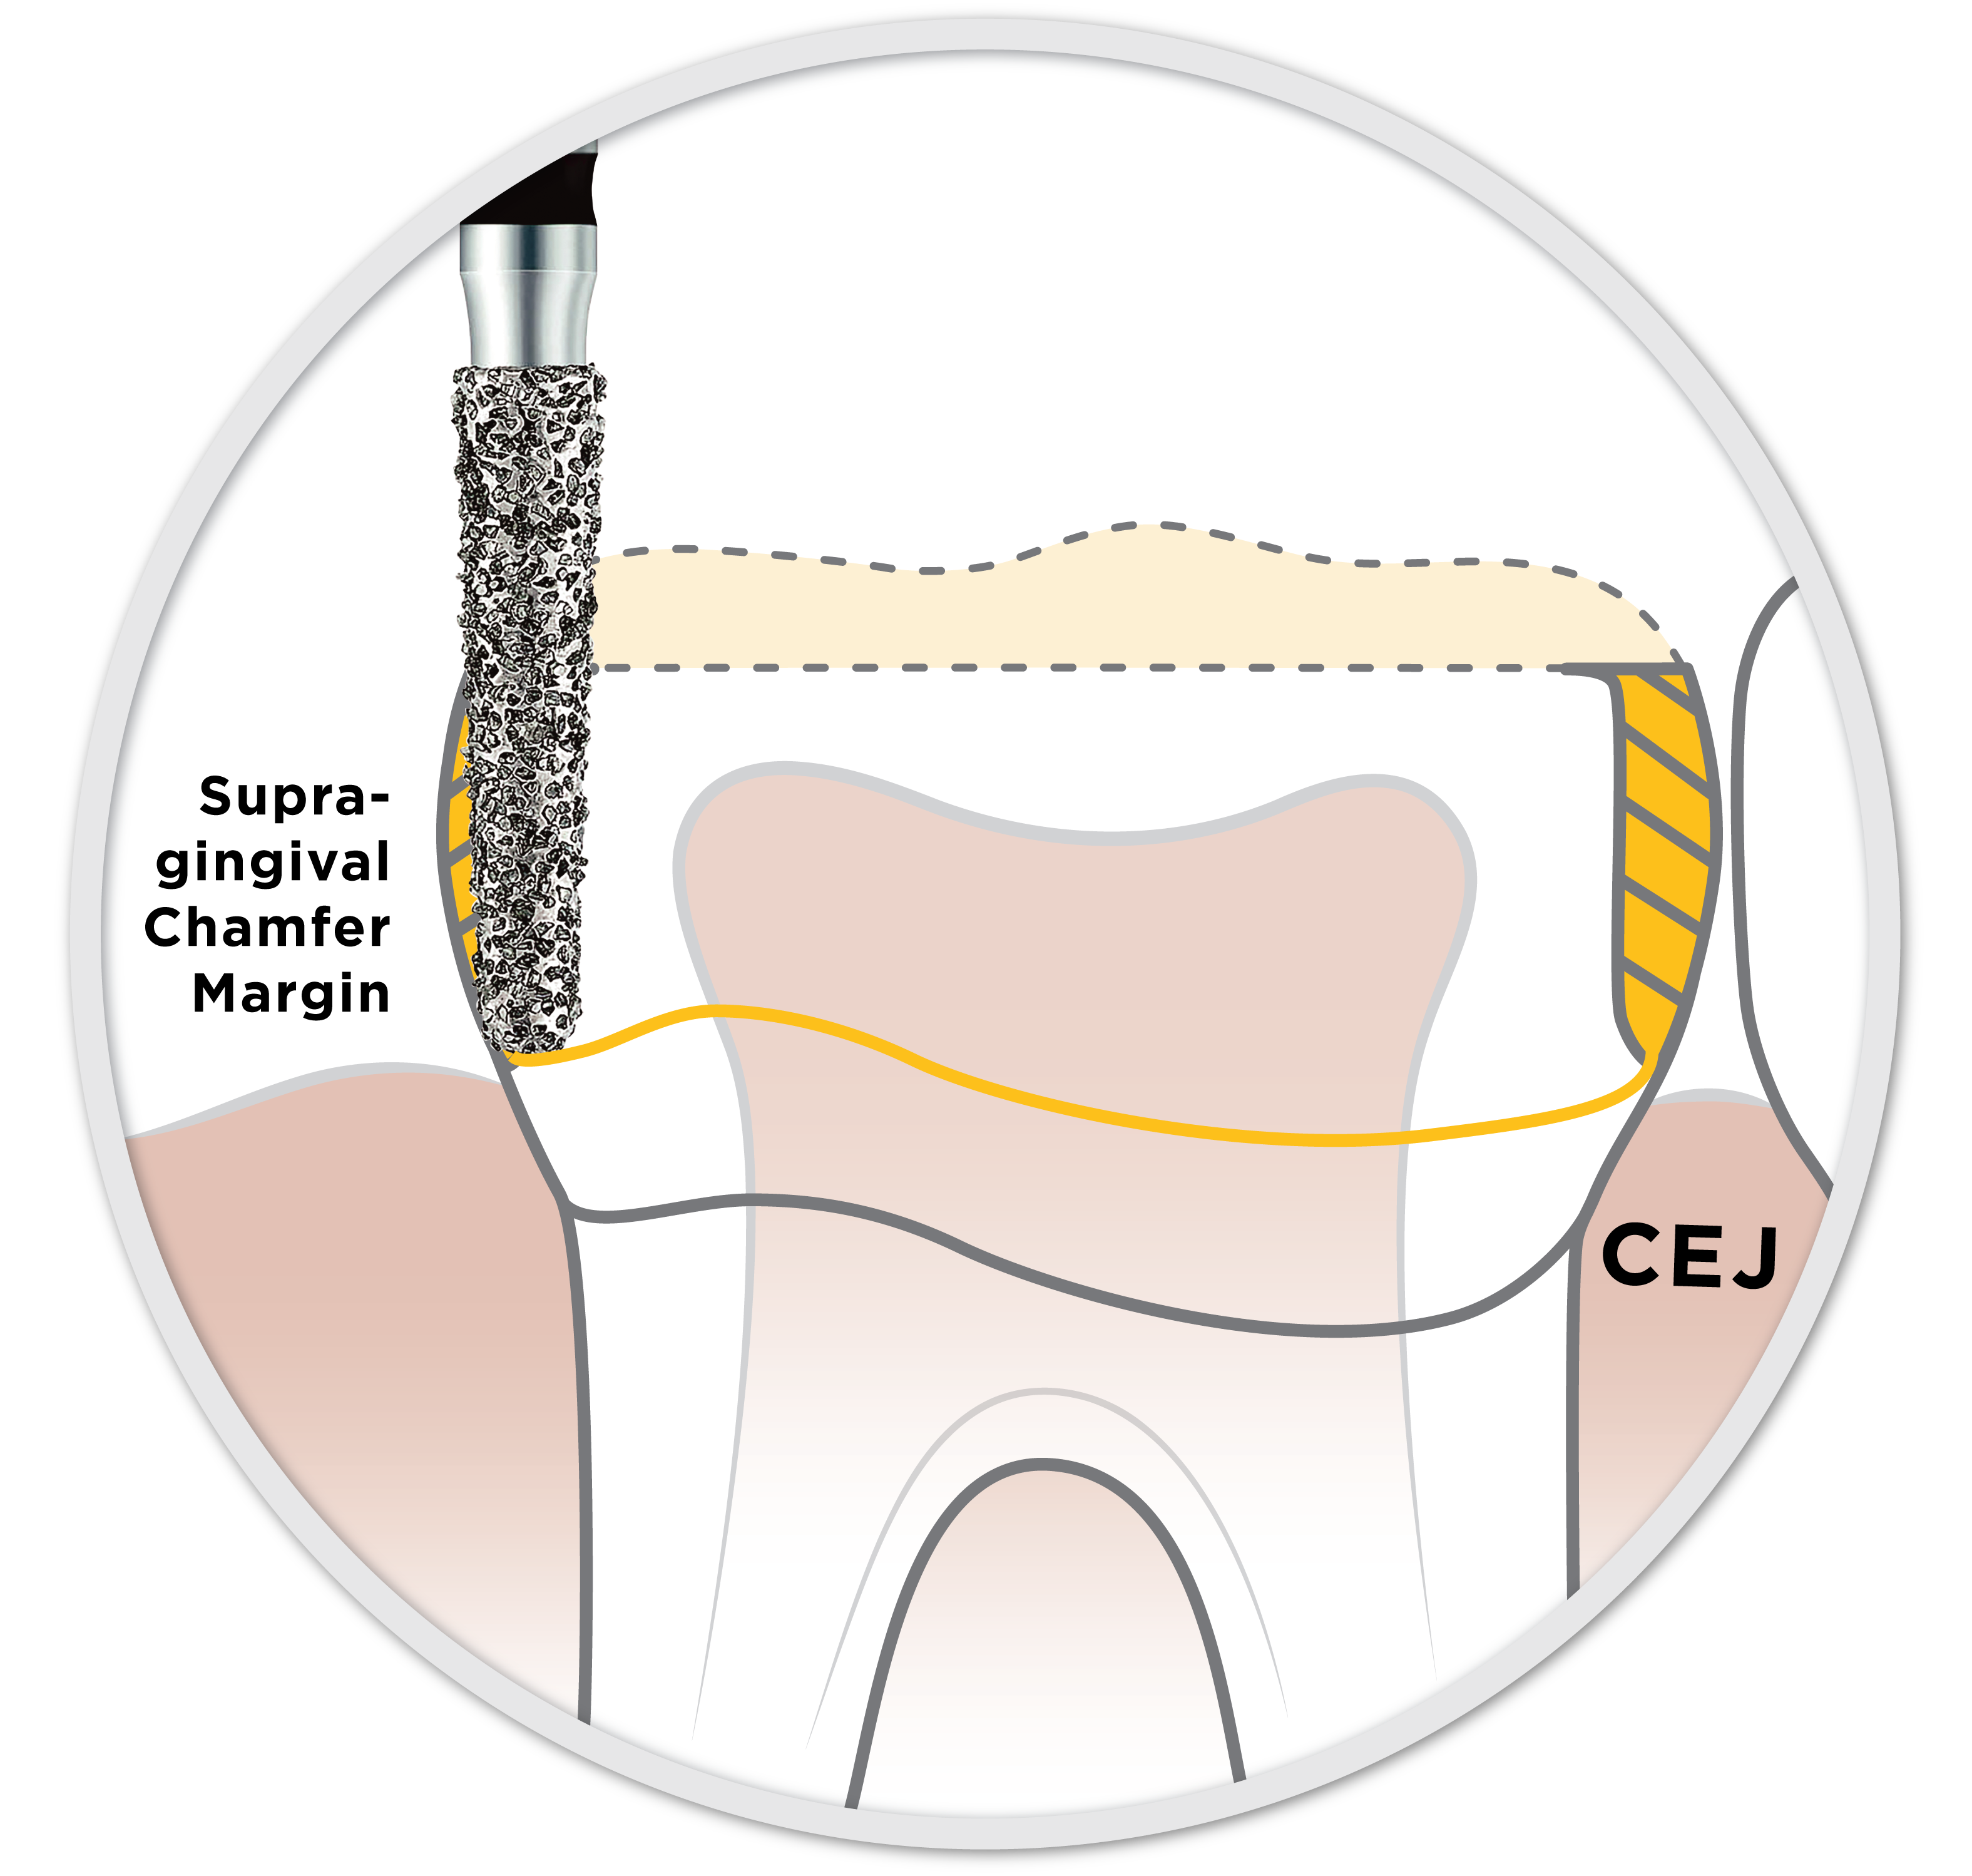
Supragingival axial reduction
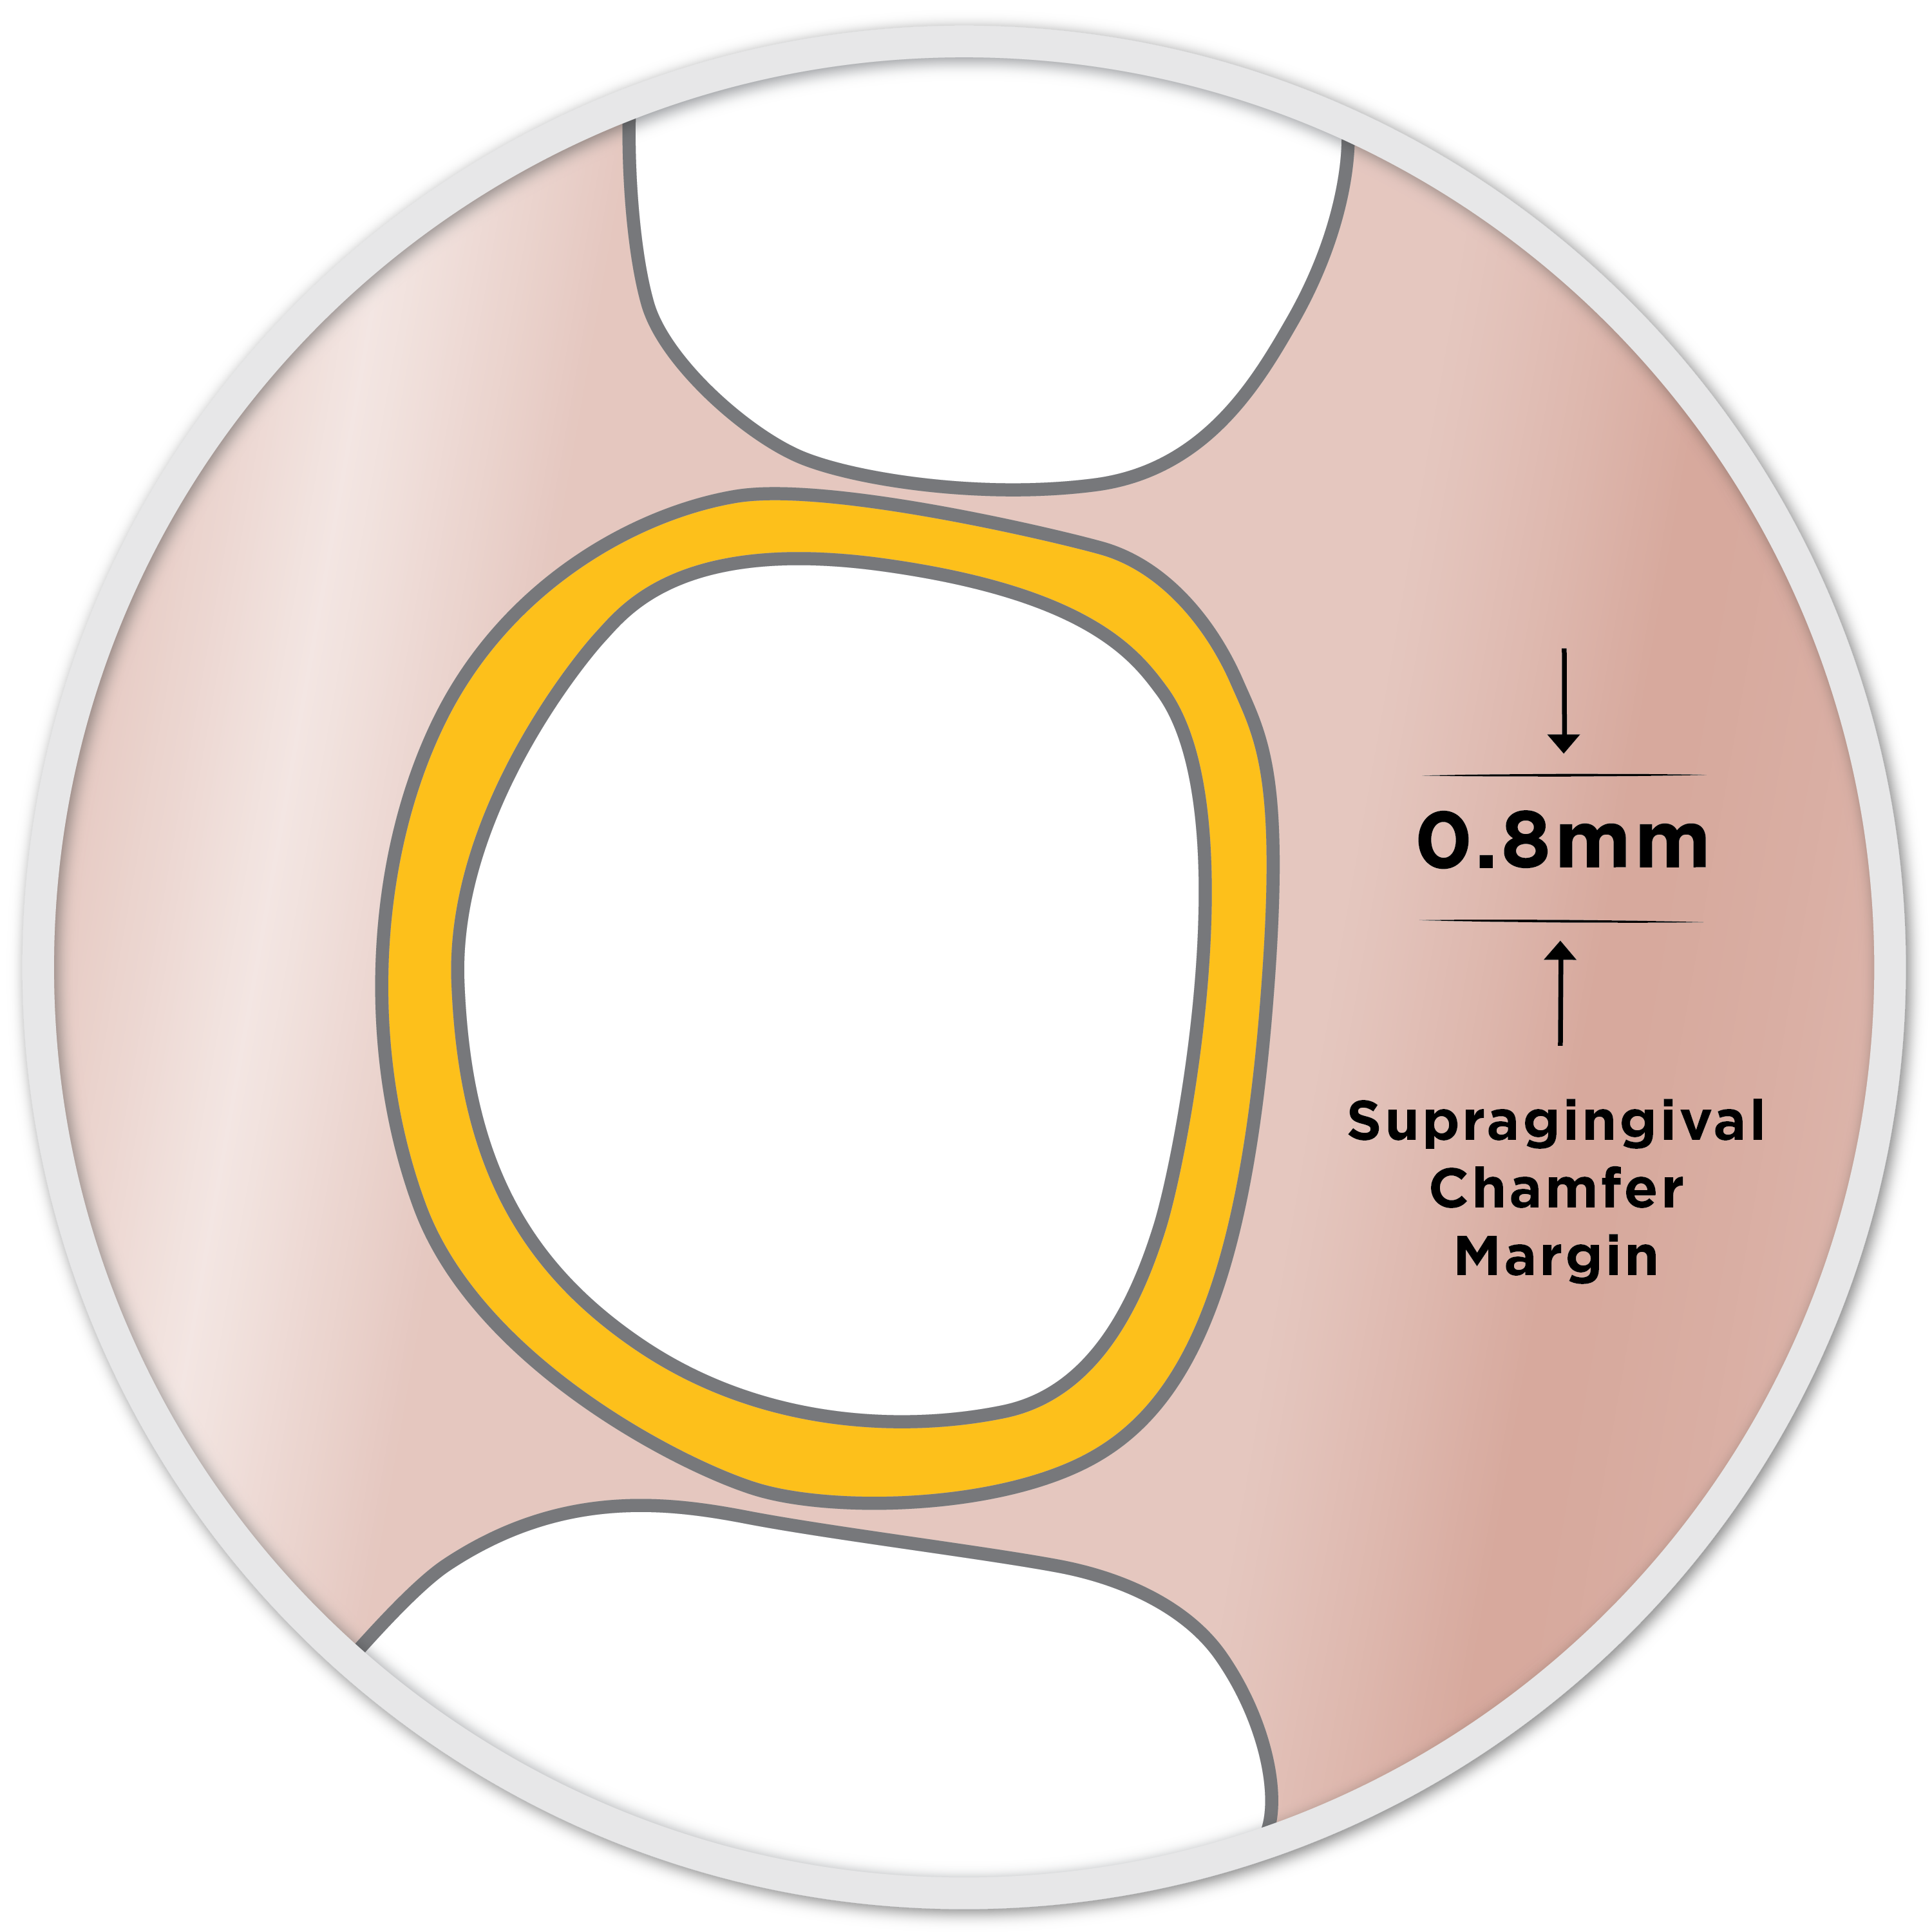
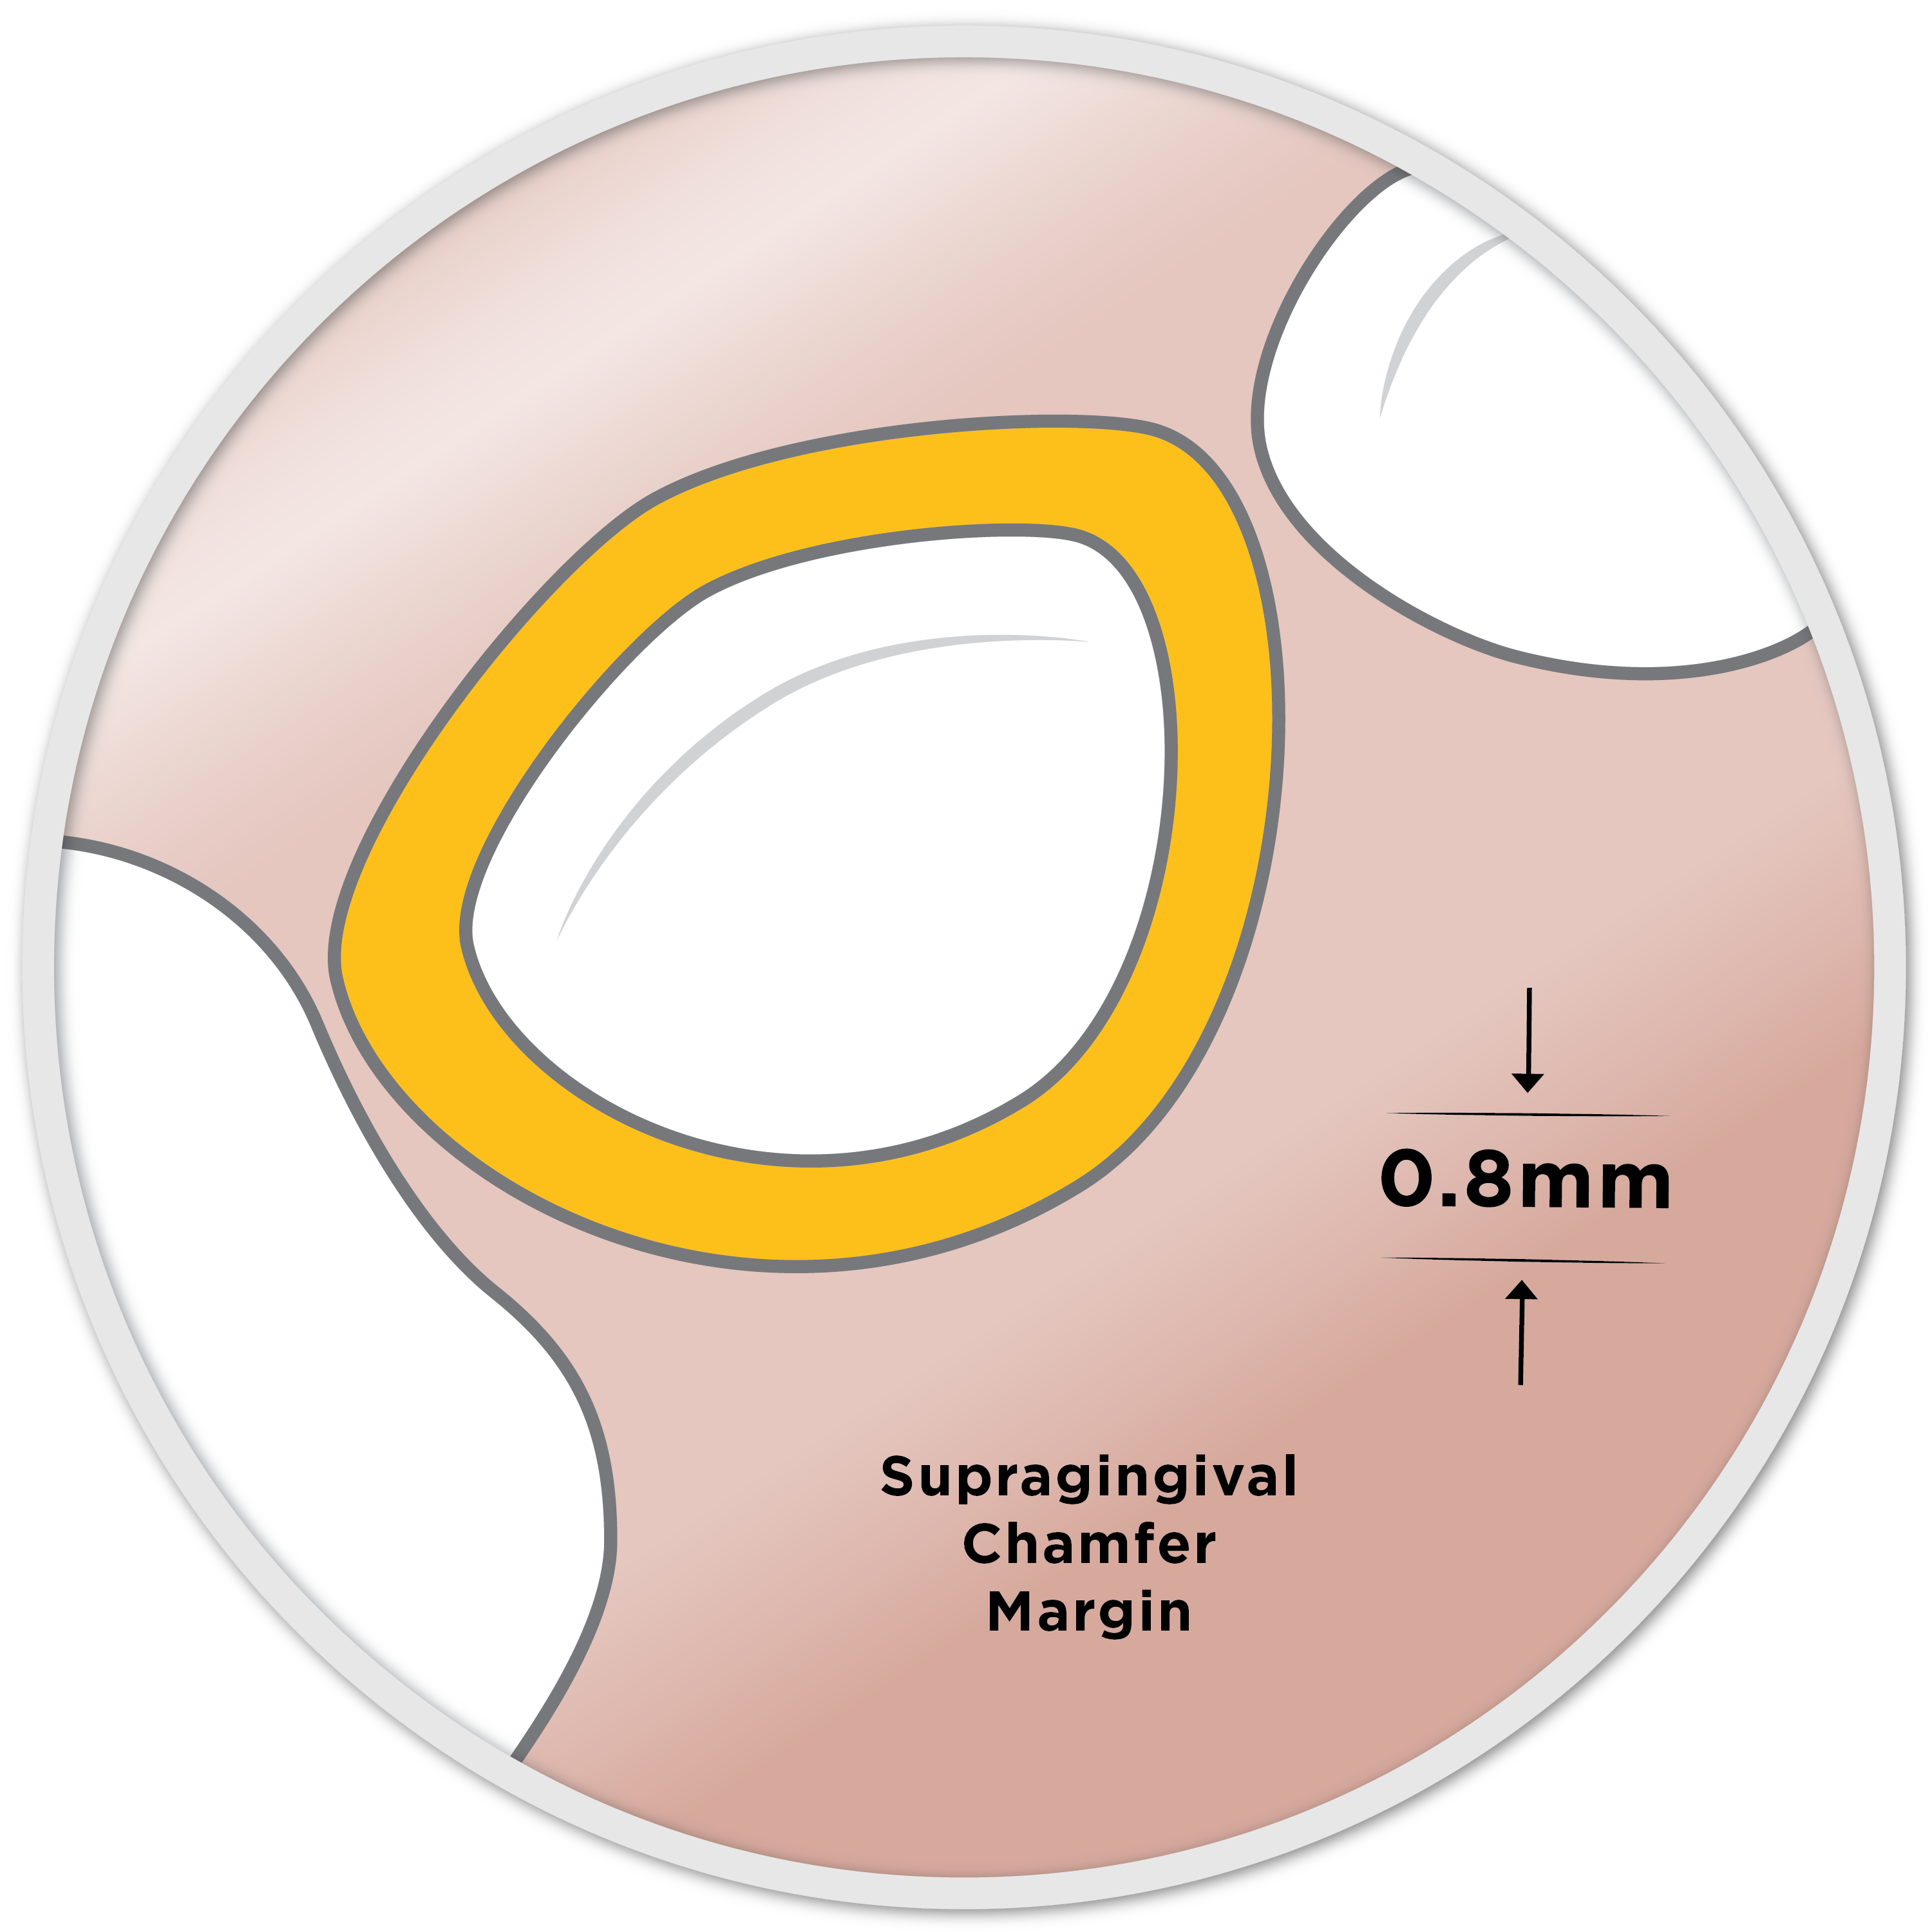
Keeping perpendicular to the occlusal table, use the EZPrep 002 Bur to create a chamfer margin at the gum line equal to the full thickness of the bur tip. Do not taper. The axial depth-cut “racetrack” is visible 360° around the preparation.
Pro tip
The taper of the bur provides adequate prep taper. Do not additionally taper the prep. Avoiding any additional taper will minimize the chance of pulp exposure.
Checkpoint
A “racetrack” should be easily identifiable around the entire prep at a quick glance. If not, prep more: “Ring-around-the-rosy” five times. Final prep should be a smooth cylinder.
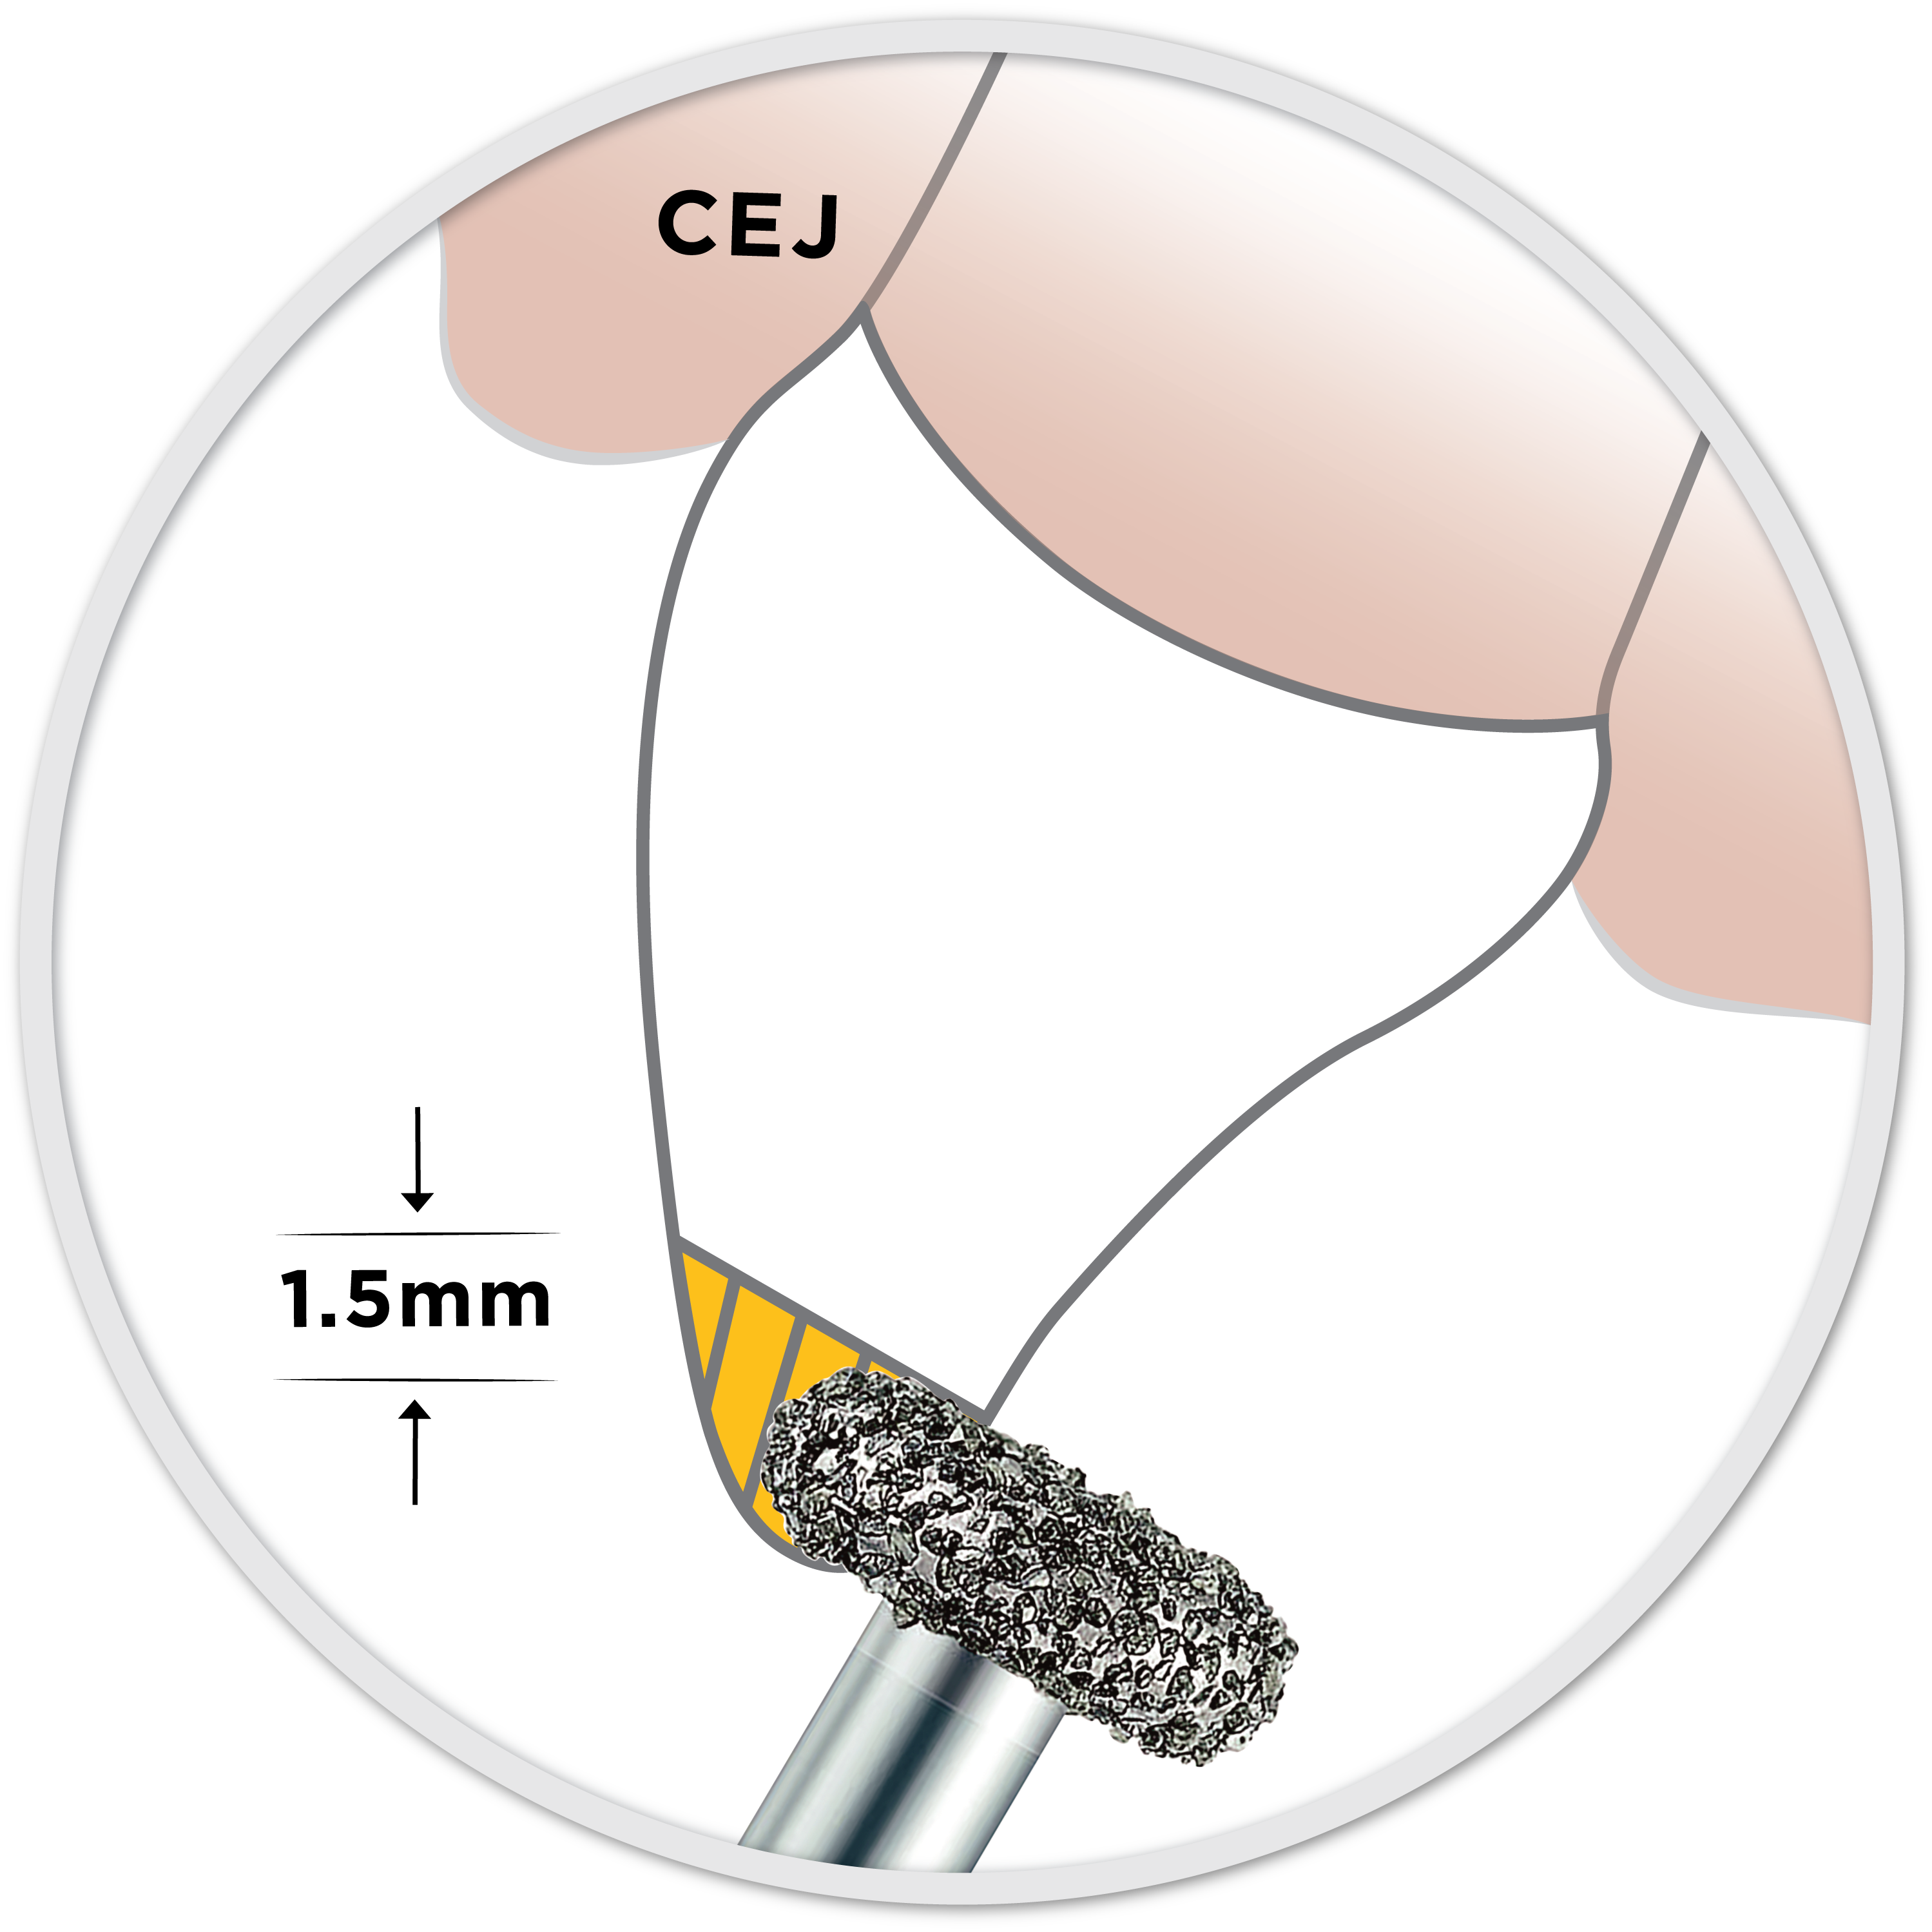
Subgingival axial reduction
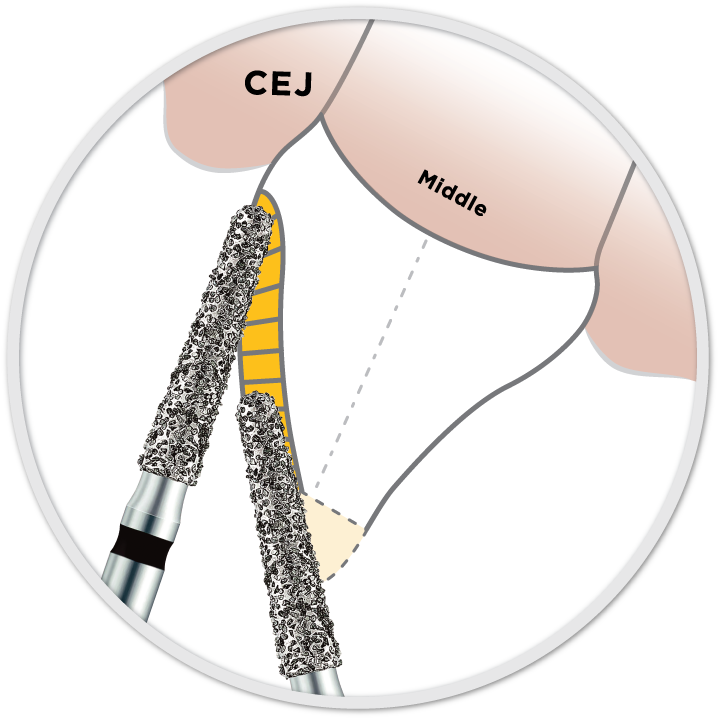
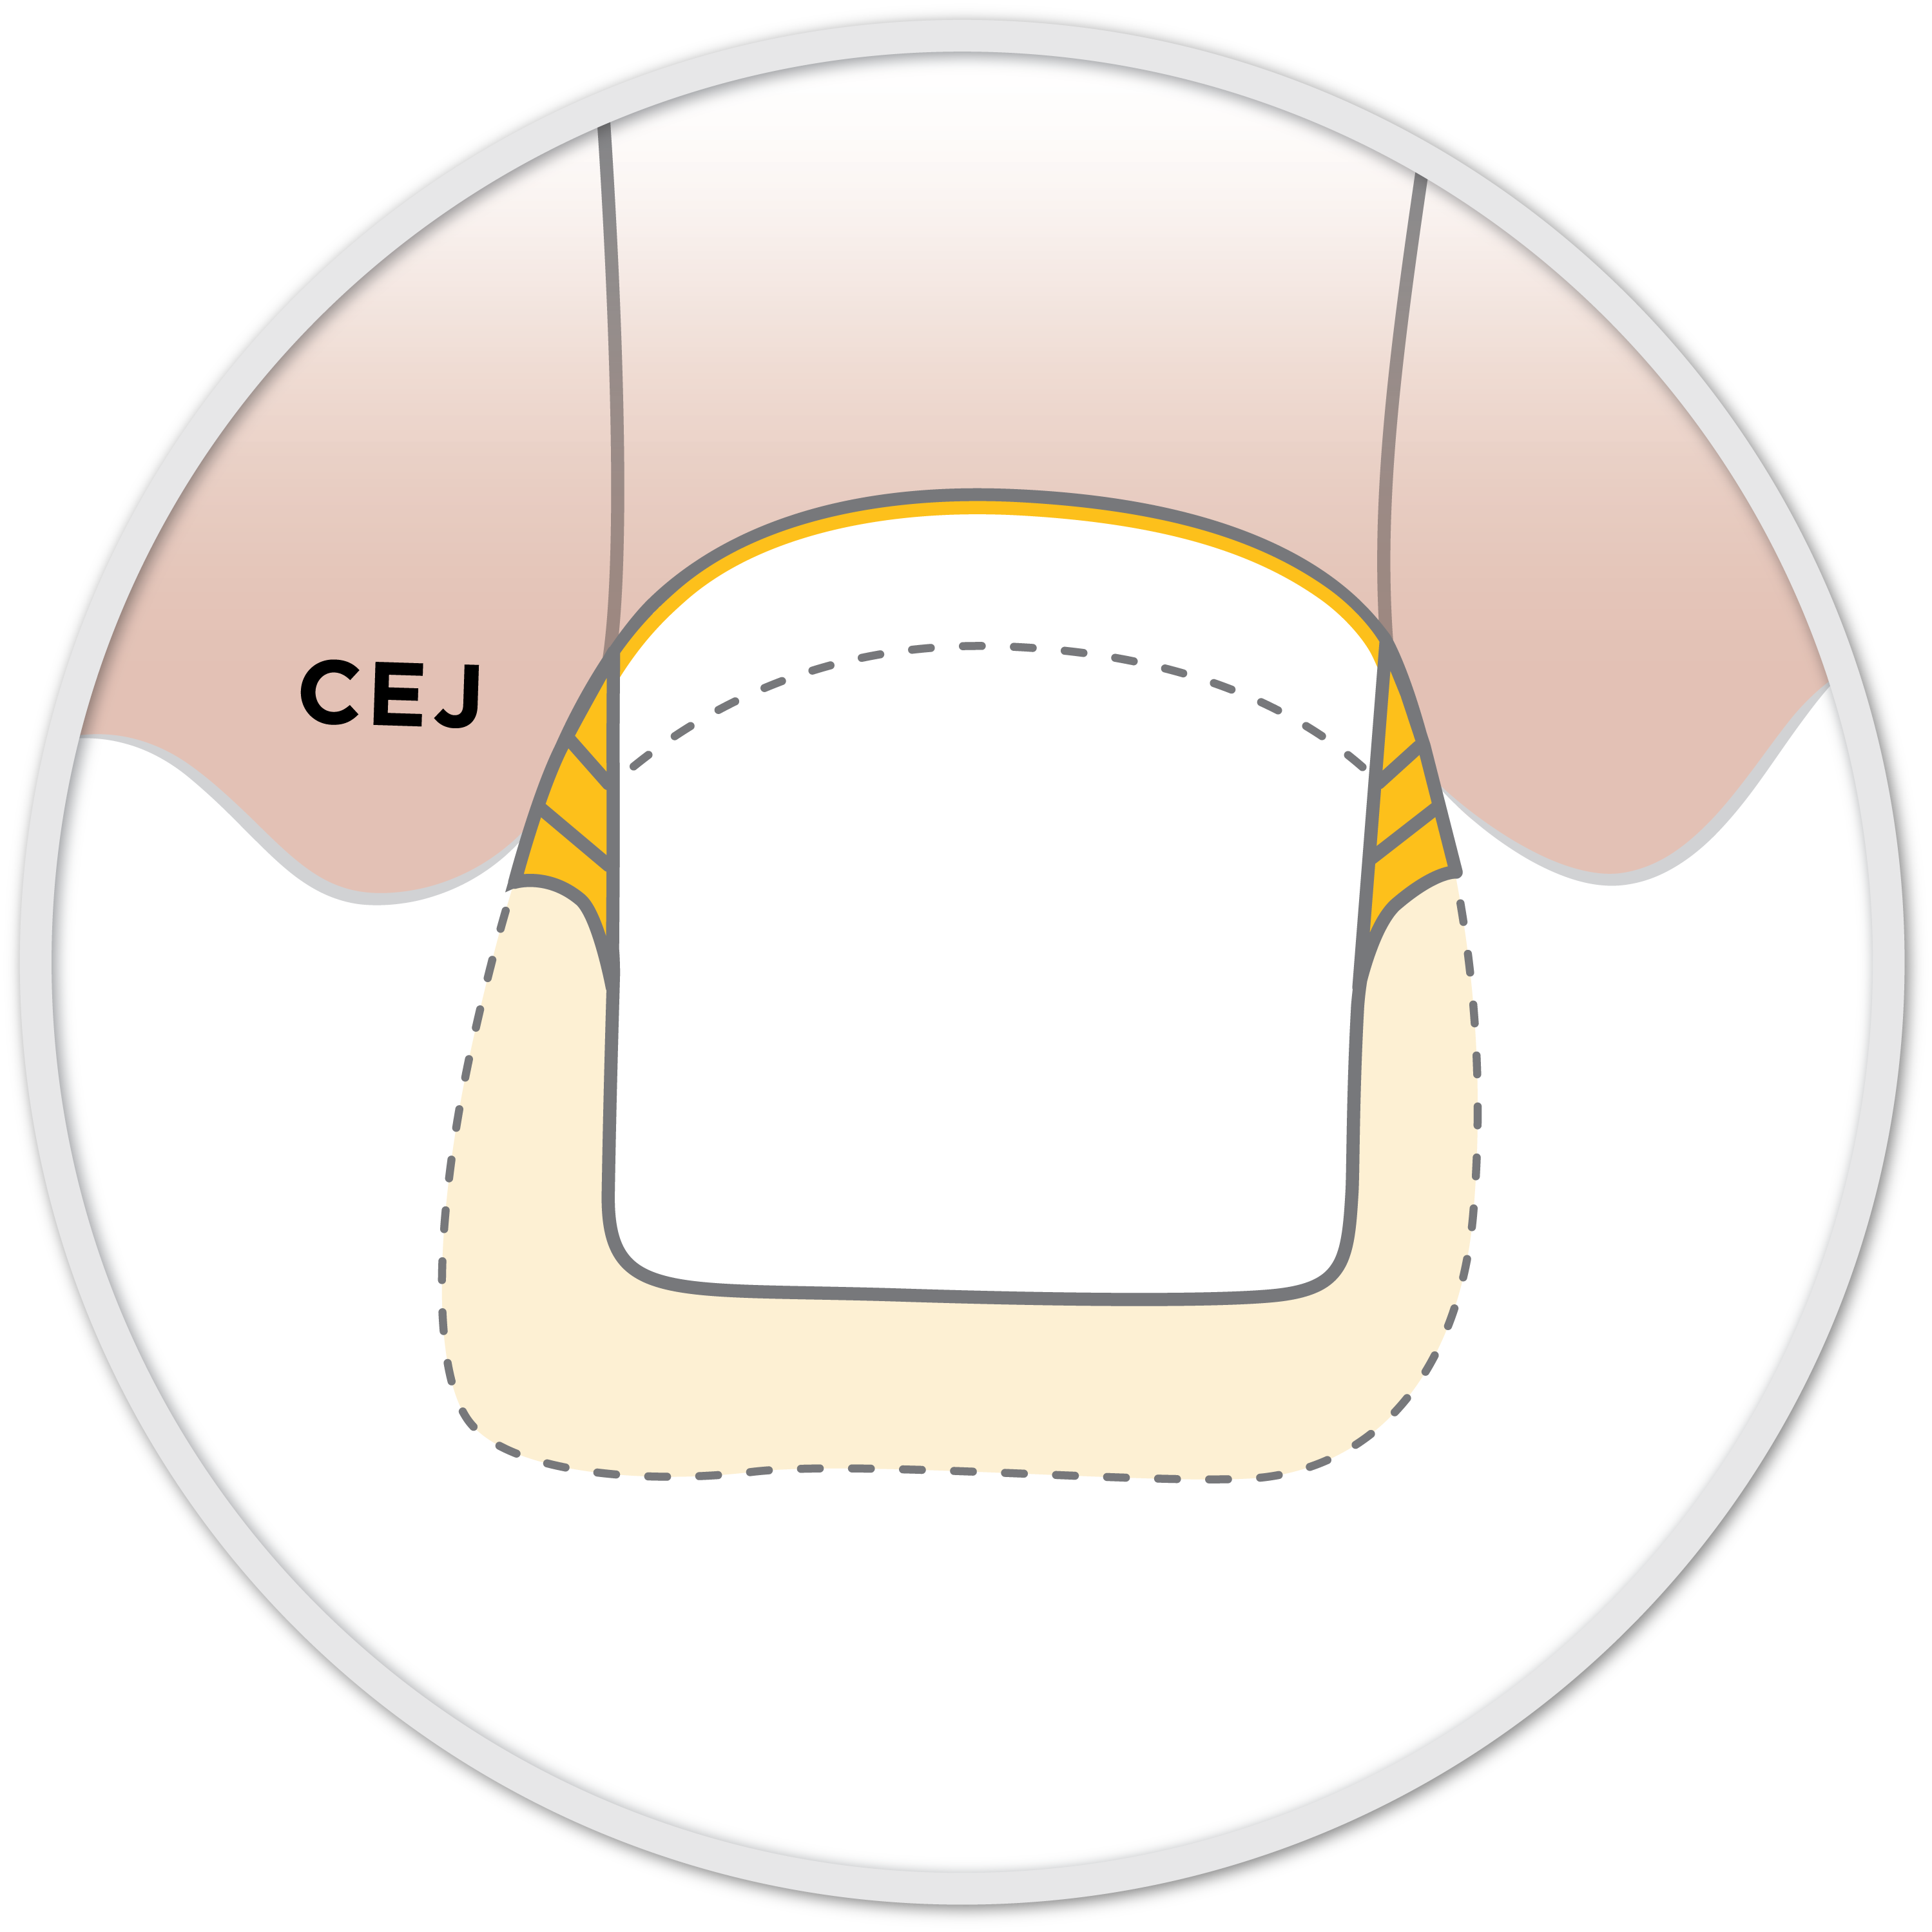
While hugging the bur axially along the root surface, extend the tip of the EZPrep 004 Bur 2.0mm subgingivally. All of the chamfer margin should be gone, leaving a smooth transition from the root, past the CEJ, to the coronal tooth.
Pro tip
The buccal bulge must be completely removed to allow for a passive fit. In younger patients, this tooth structure may be hiding below the tissue line. Therefore, it is essential to extend the tip of the EZPrep 004 bur 2.0mm subgingivally.
Go back and check the mesio-buccal of the first molars and the disto-lingual of the second molars as these are commonly under-reduced areas.
Checkpoint
Watch for these areas as they are the most commonly underprepared.
All of the chamfer margin should be gone, leaving a smooth transition from the root, past the CEJ, to the coronal tooth. Verify completion of this step by using an explorer (or EZPrep 004 bur tip) going from root to tooth ALL the way around the preparation. If any chamfer or labial bulge remains, go back and remove them with the EZPrep 004 flame bur.
Incisal reduction
The incisal reduction is 1.5mm—the full thickness of EZPrep 001 Bur. Rest the bur on the prepped incisal edge (the bur base should line up with the incisal edge of the adjacent tooth).
Would you rather watch?
Cuspid
Single unit preparation: C
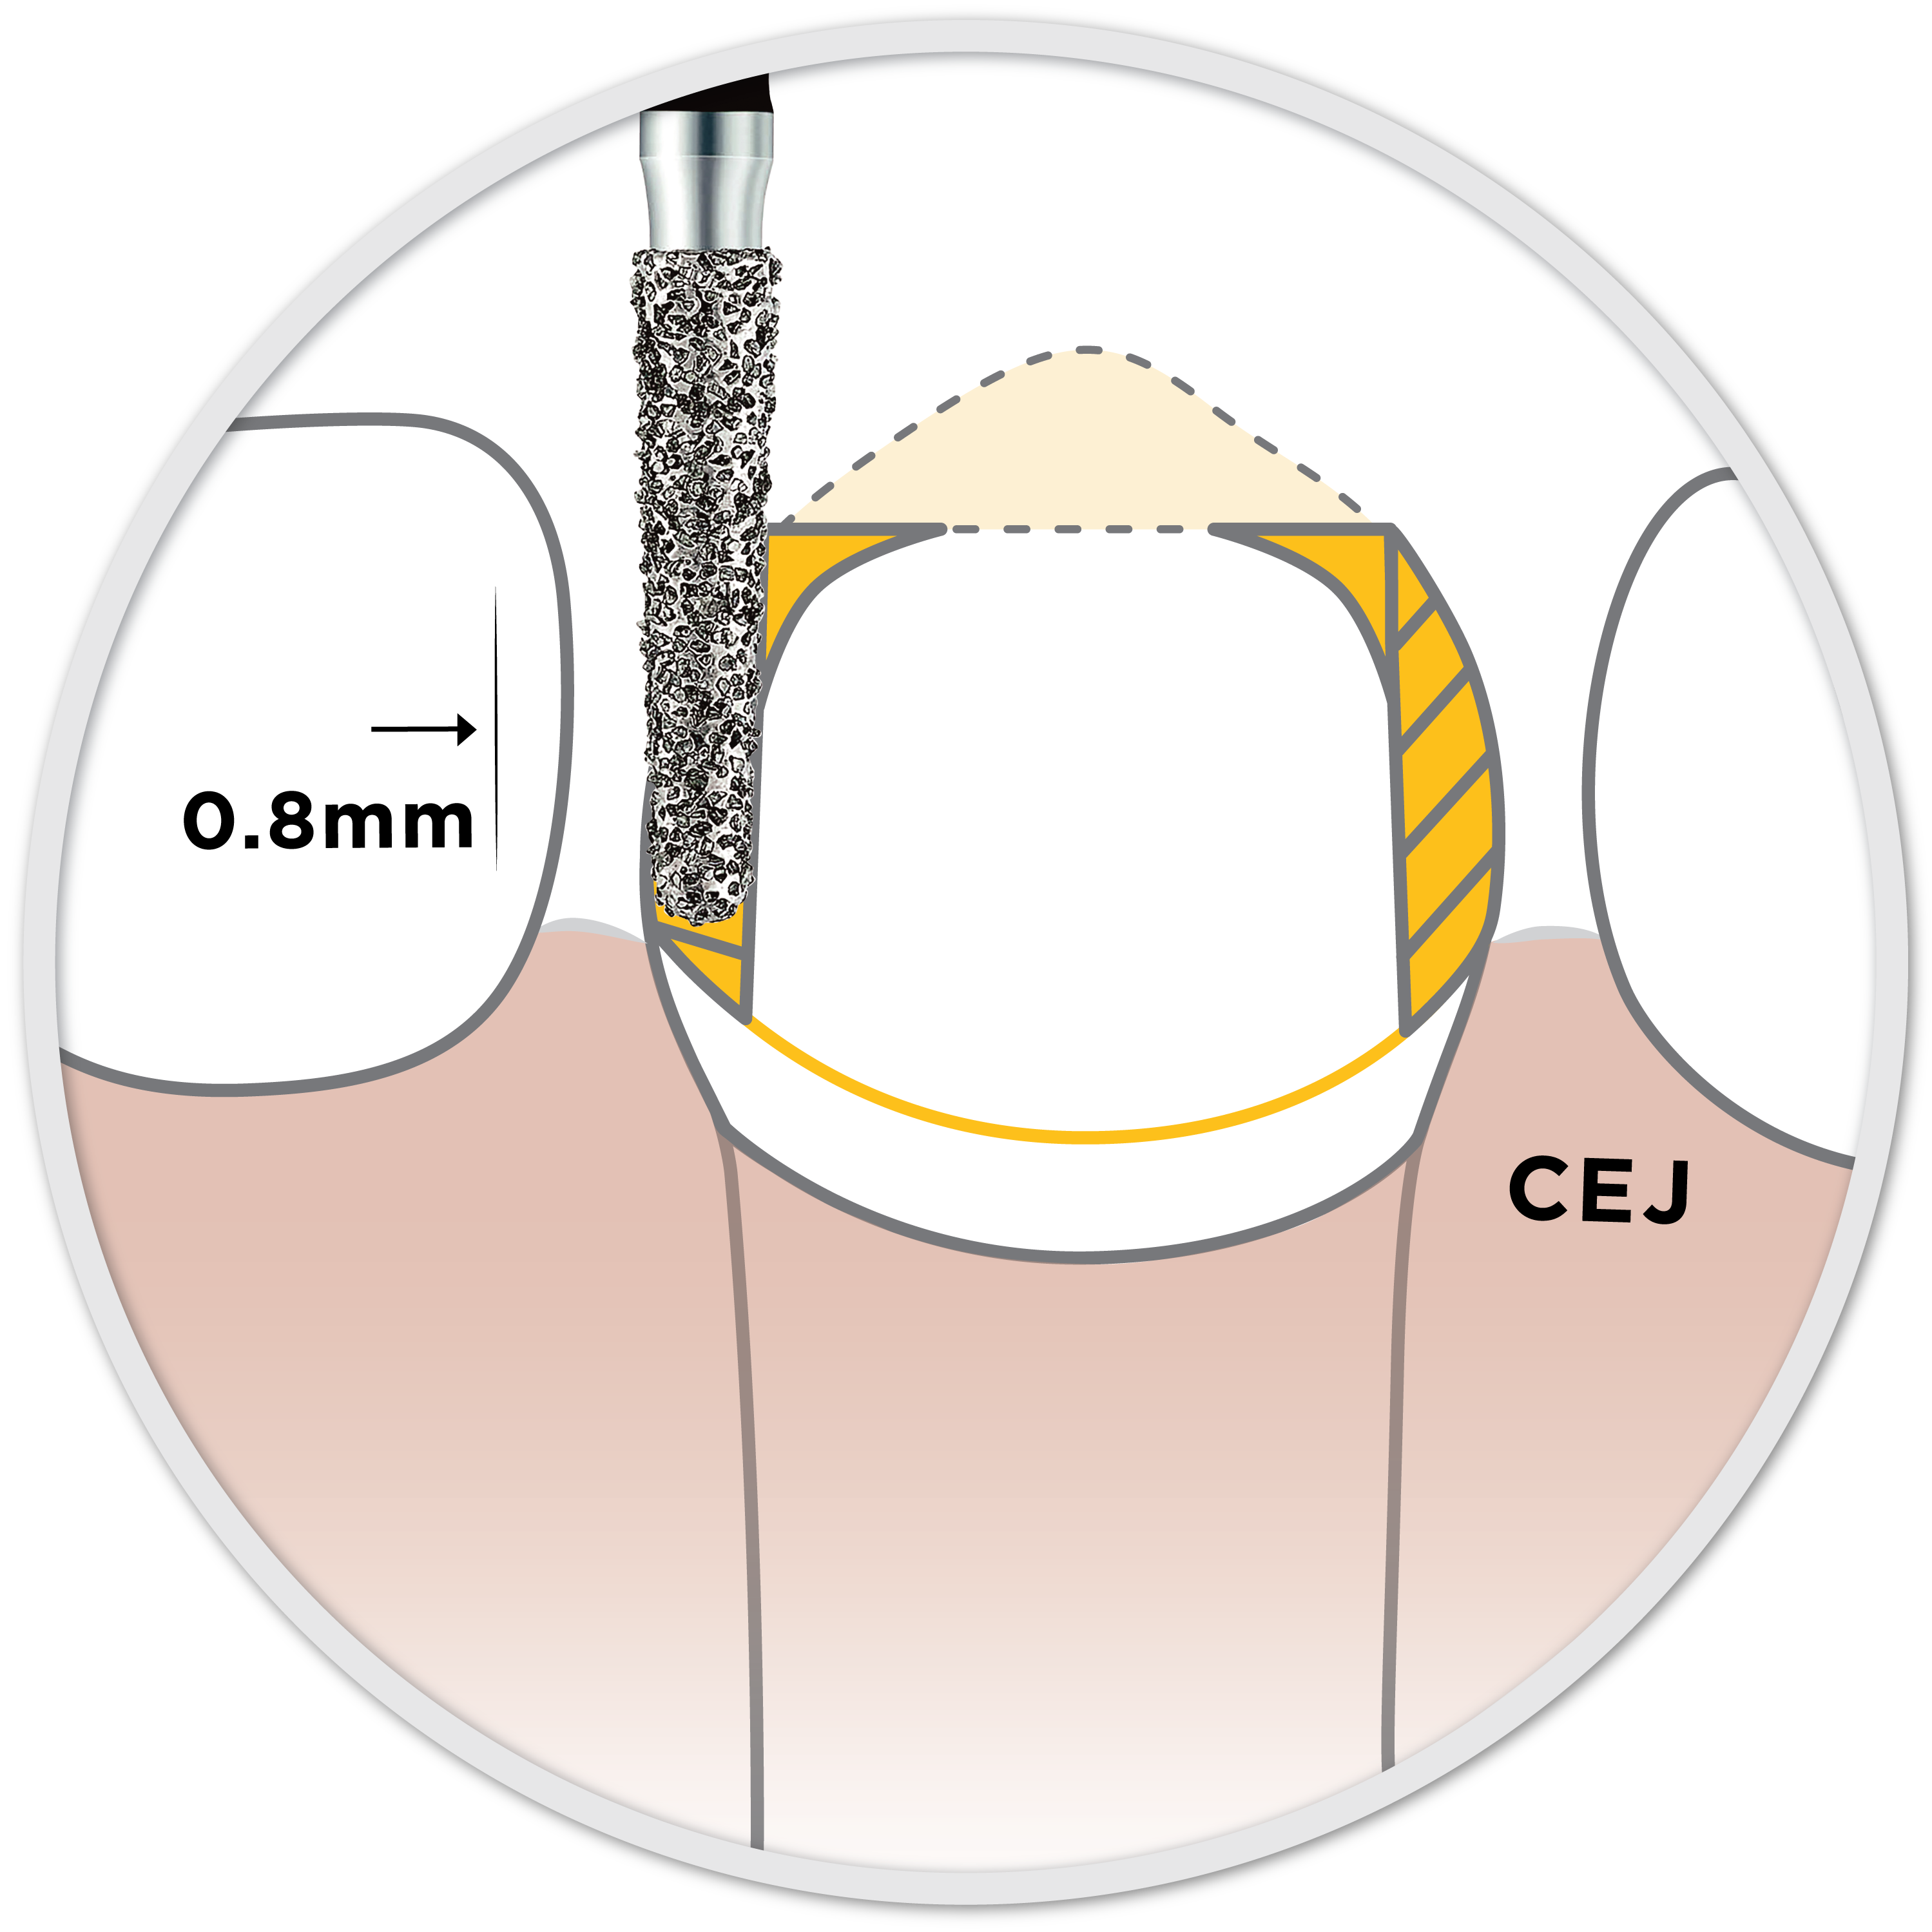
Supragingival axial reduction
Create a chamfer margin at the gum line the full the thickness of EZPrep 002 Bur (0.8mm) around the entire tooth. Taper the incisal half lingually to create a thin incisal edge. Round the sharp corners.
Facial reduction
After the chamfer margin reduction is finished, roll back the incisal half of the facial plane. Create a thin incisal edge with additional facial reduction midpoint to the inciscal edge.
Checkpoint
A “racetrack” should be easily identifiable around the entire prep at a quick glance. If not, prep more: “Ring-around-the-rosy” five times.
The incisal edge of the prep should match the arch form.
Lingual reduction
The lingual surface is concave and extends from the gingiva to the incisal edge. Use the EZPrep Bur 003 to remove lingual tooth structure and extend to include the incisal edge.
Subgingival axial reduction
Remove the chamfer margin. Once the chamfer margin is gone, extend the tip of the bur the full 2.0mm subgingivally while hugging the bur axially along the root surface.